Table of Contents
- Building an IntelliJ Plugin: 1. Environment Setup
- Building an IntelliJ Plugin: 2. Define an Action
- Building an IntelliJ Plugin: 3. Build & Publish
Building an IntelliJ Plugin
In this post, I walk through how to build an IntelliJ plugin on macOS. You can also generate a project with Gradle, but here I use DevKit for a faster setup.
Create a Plugin Project
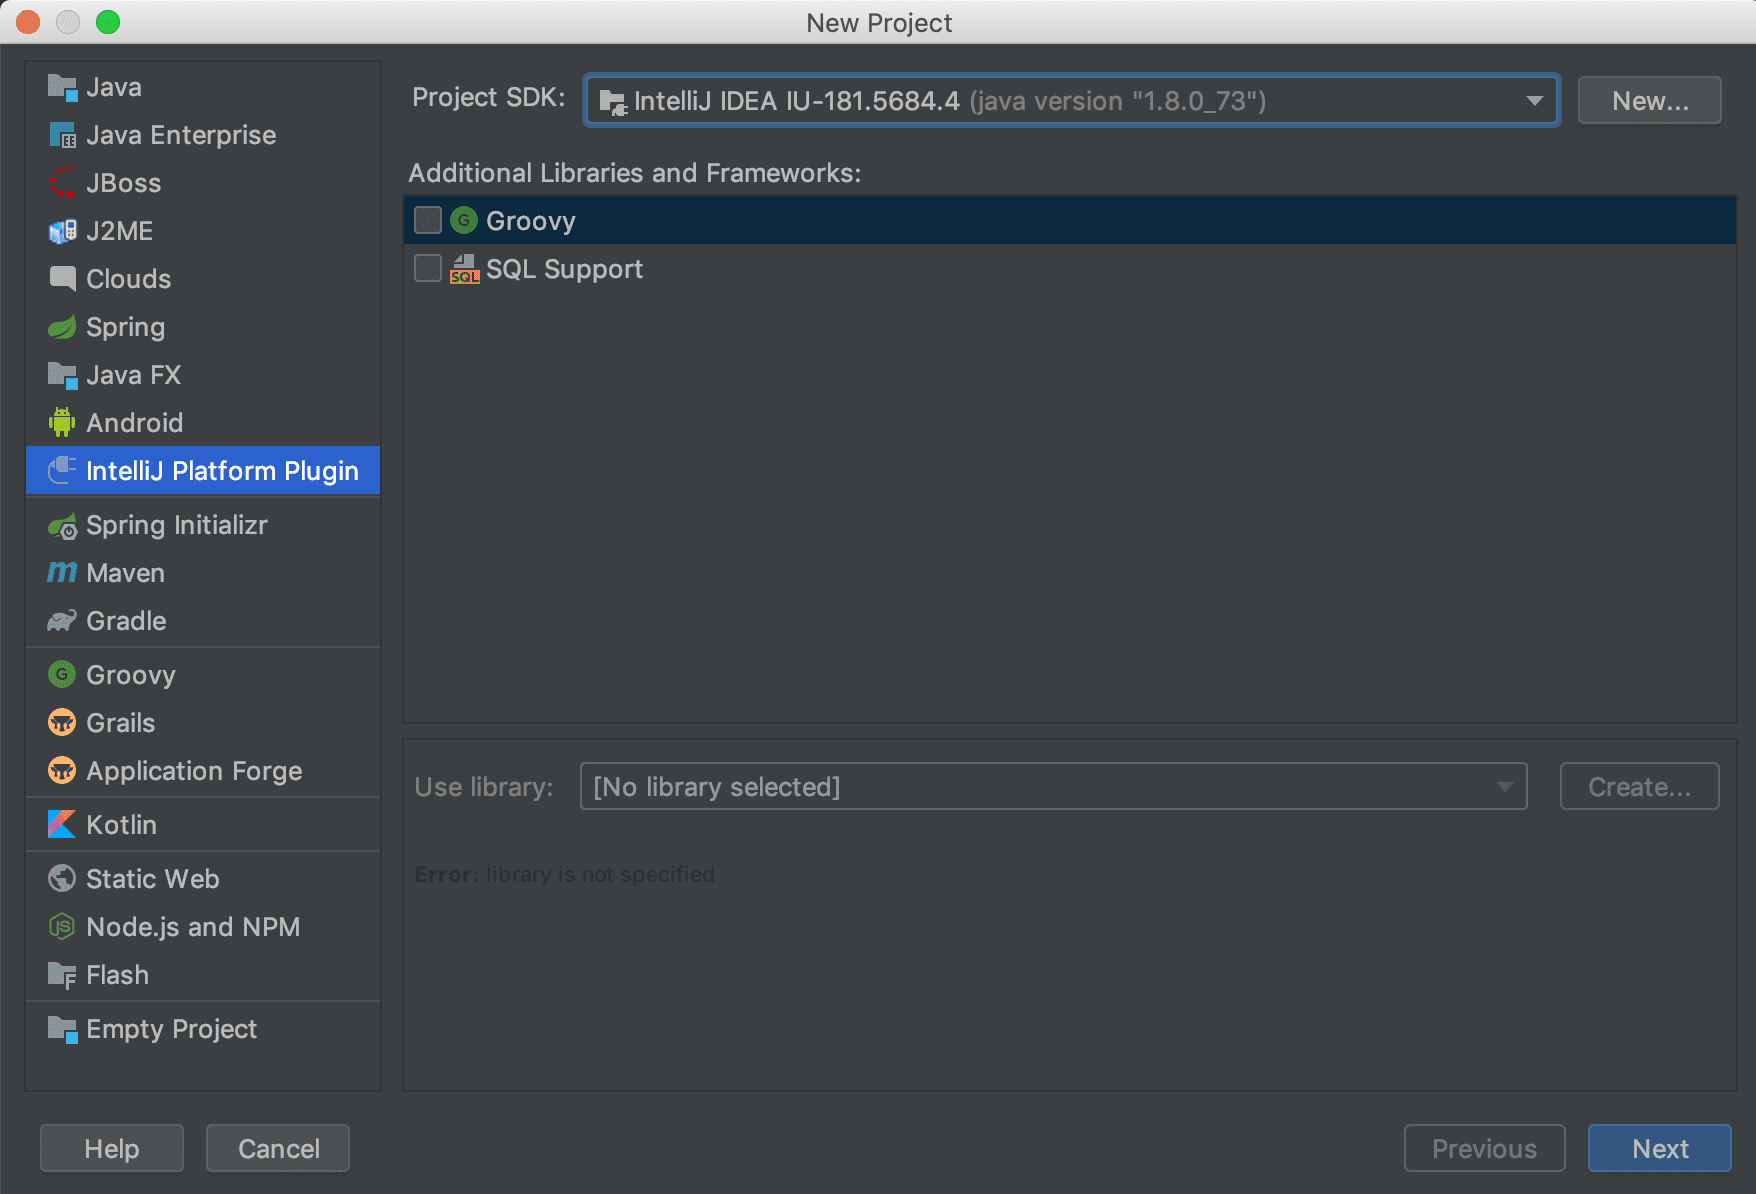
To build a plugin, first create a plugin project in IntelliJ. Go to File -> New -> Project… and choose IntelliJ Platform Plugin on the new project screen.
Once you name the project, the project is created. The name you set here is the project name, and the actual plugin name can be different. If you manage your source code on GitHub, keep the name consistent with the repository name. The details used for publishing appear in the next section.
Verify the Development Setup
After the project is created, check that the development settings are correct. In Project Structure, verify Project SDK. It should be IntelliJ Platform Plugin SDK.
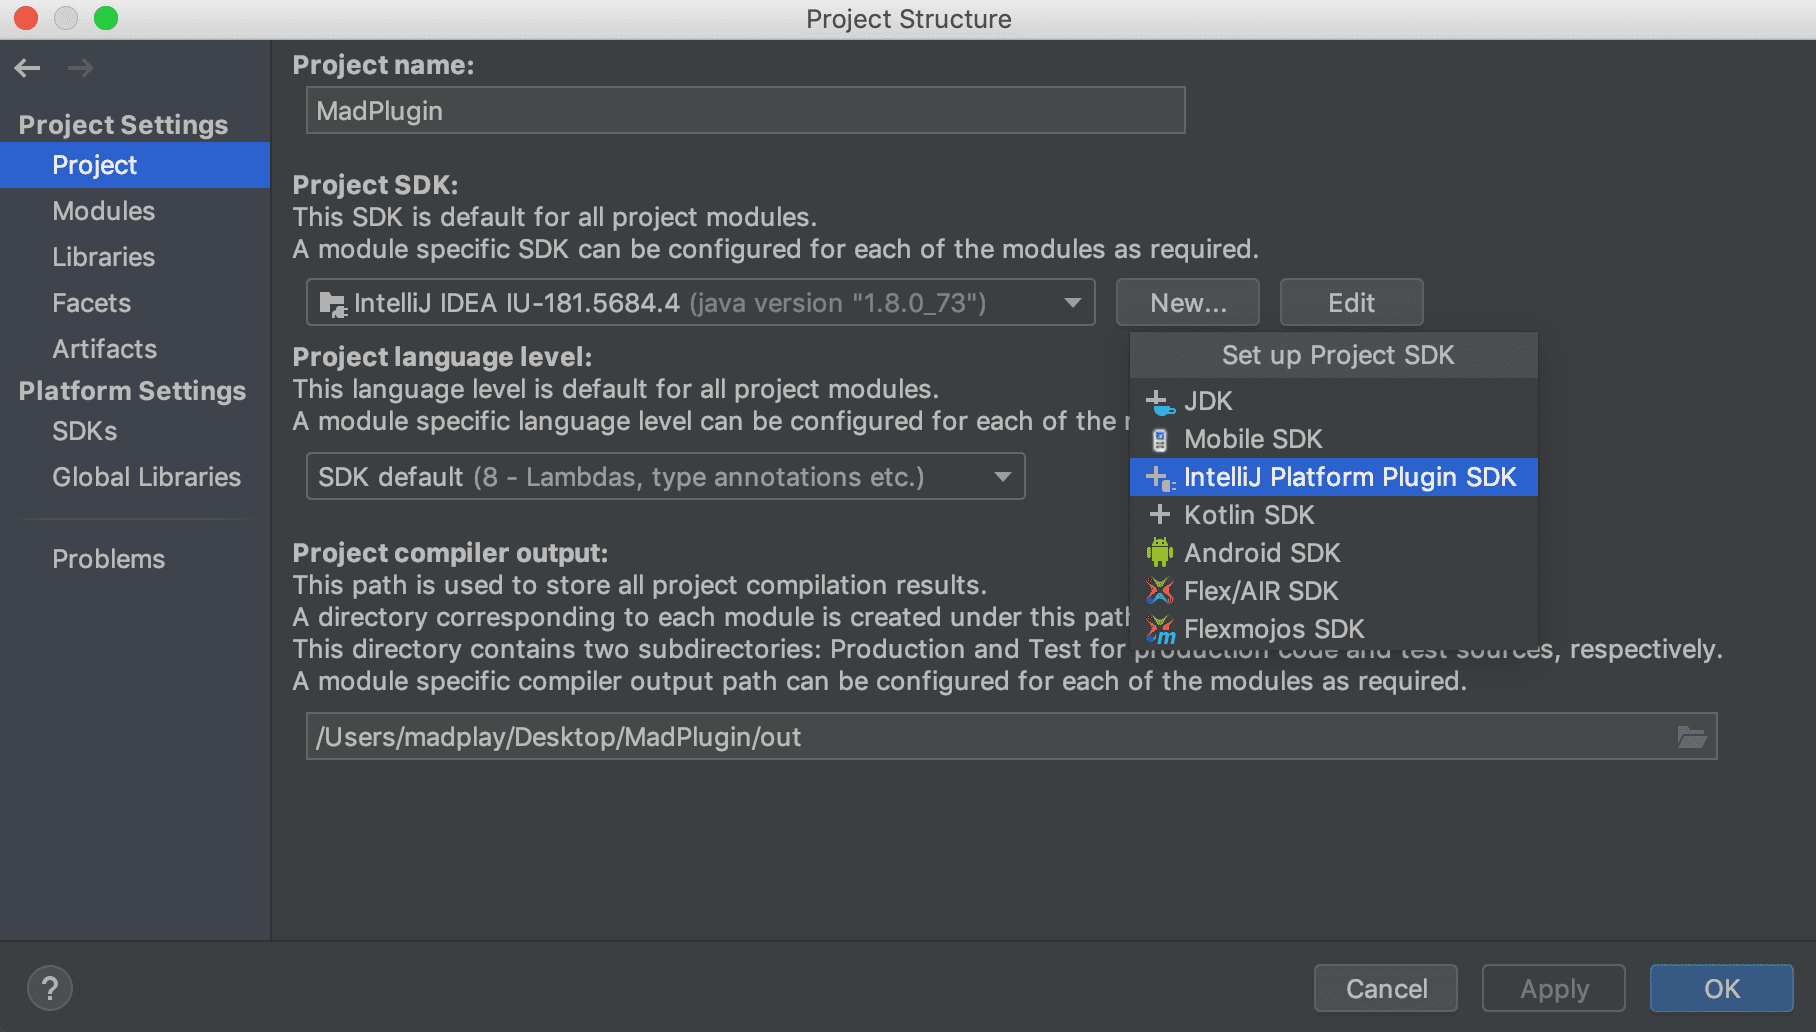
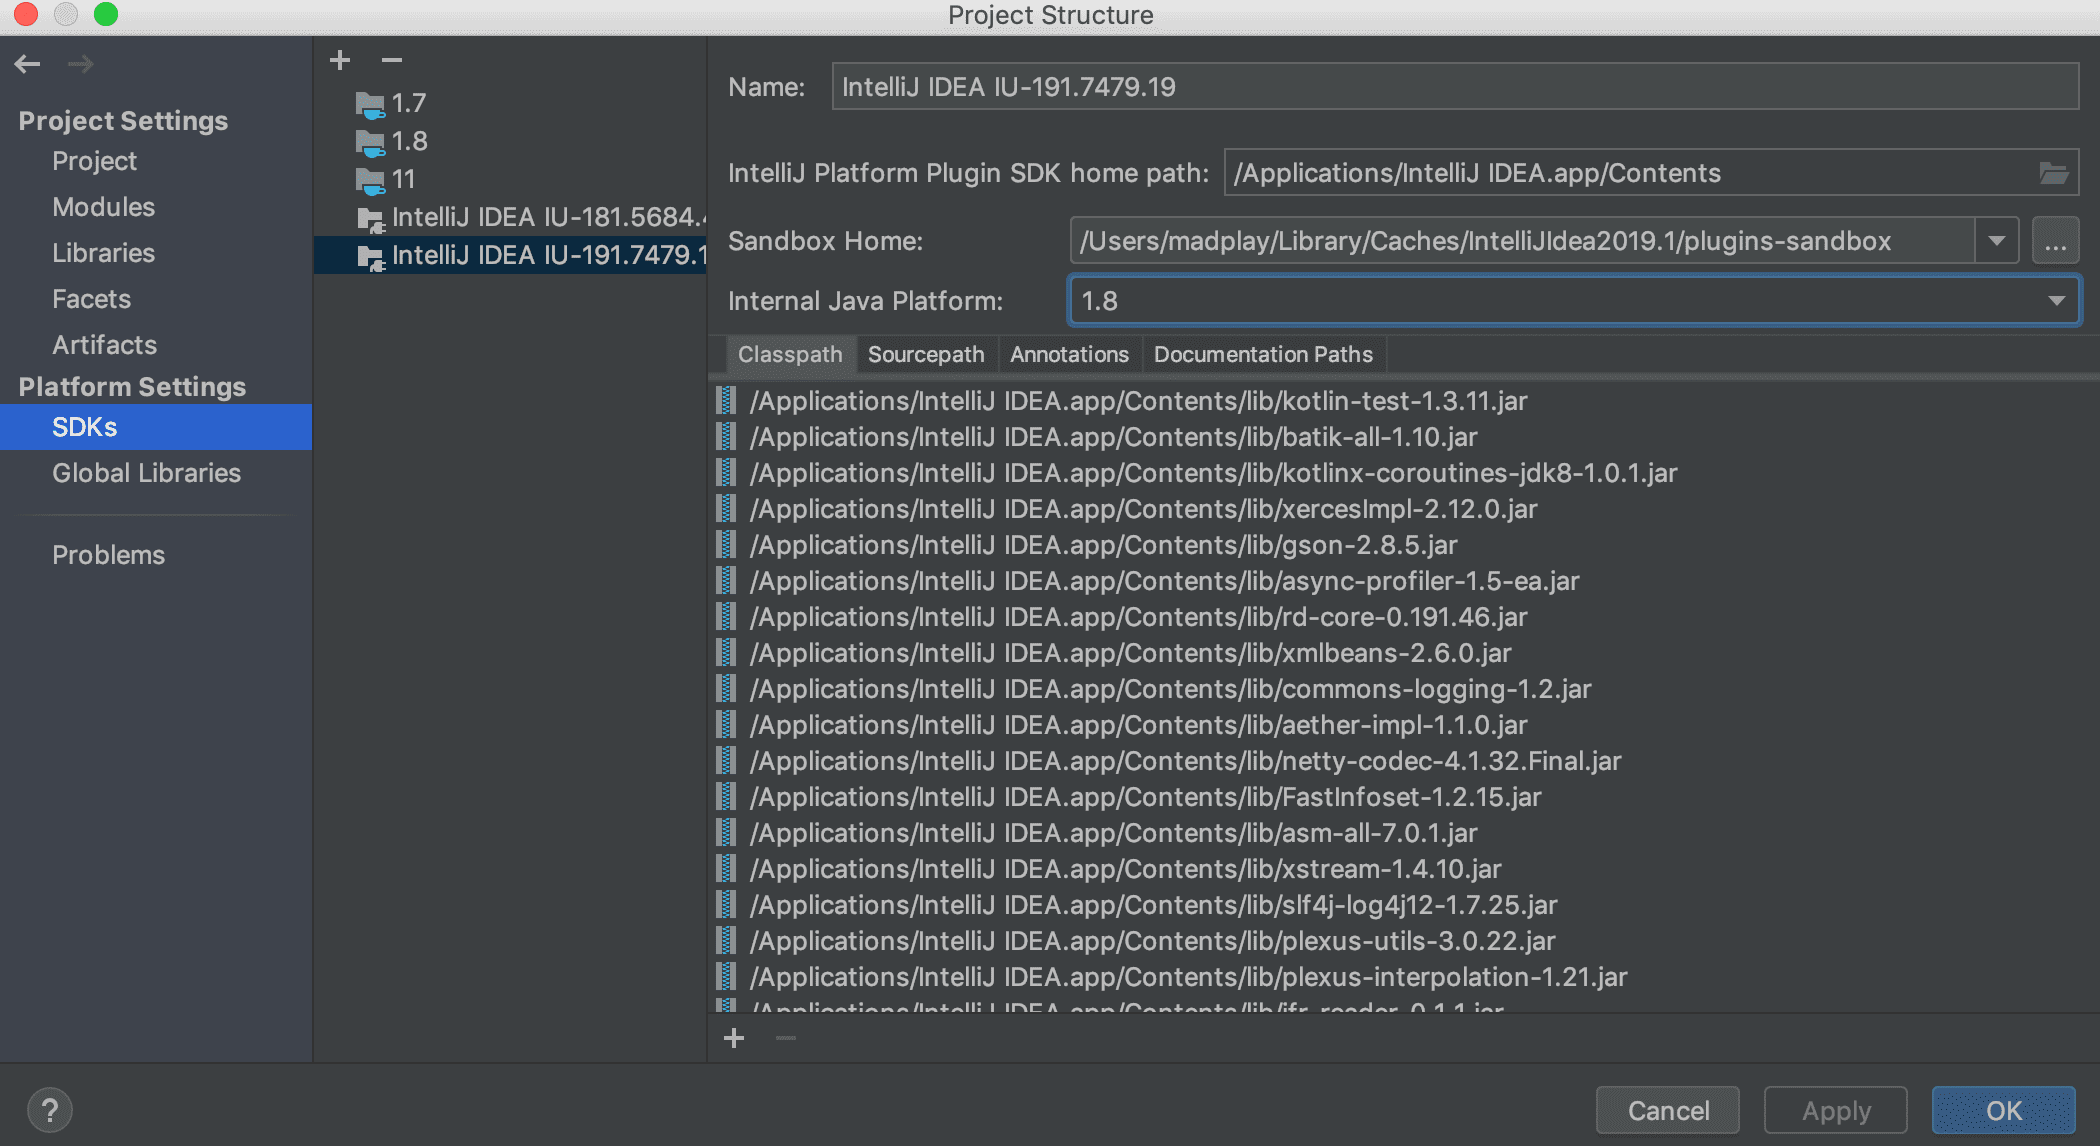
If it is not set, click New and add the SDK version that matches your IntelliJ version. Once configured, the SDK shows up in the project settings as below. In this example, I use IntelliJ 2019.1 (Build 191) with Java 8.
Check the Project Structure
After these steps, the project structure looks like the screenshot below. Right after creation, there are only a few files.
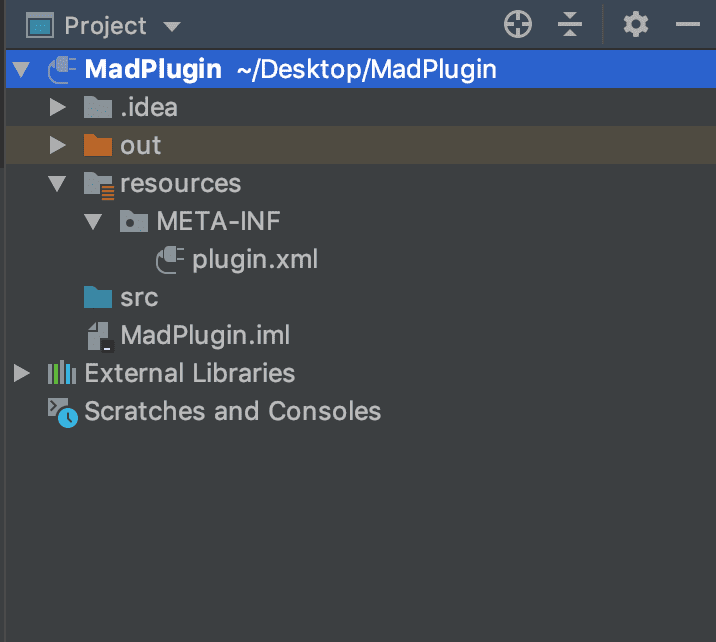
The src directory is the root source directory for the plugin. The out directory contains build outputs. The most important file to pay attention to is plugin.xml. This is where you manage the plugin ID, name, version, and change notes.
<idea-plugin>
  <id>MadPlugin</id> <!-- Unique plugin ID. It cannot change after upload. -->
  <name>Mad-Plugin</name> <!-- Plugin name -->
  <version>0.0.1</version> <!-- Plugin version -->

  <!-- Plugin vendor info: email, url, etc. -->
  <vendor email="itsme@taeng.com">madplay</vendor>

  <!-- Plugin description -->
  <description><![CDATA[
      blah~ blah~
    ]]></description>

  <!-- Per-version change notes -->
  <change-notes><![CDATA[
      <ul>
        <li>Release plugin</li>
      </ul>
    ]]>
  </change-notes>

  <!-- Build versions of IntelliJ that the plugin supports. -->
  <!-- You can specify a range using since/until. -->
  <idea-version since-build="173.0"/>

  <!-- Targets can include IntelliJ IDEA, PyCharm, WebStorm, etc. -->
  <!-- This example targets IntelliJ IDEA and Android Studio. -->
  <depends>com.intellij.modules.java</depends>

  <!-- Define other plugins that this plugin interacts with. -->
  <extensions defaultExtensionNs="com.intellij">

  </extensions>
</idea-plugin>
Next
Now you are ready to build the plugin. In the next post, I cover how to define Actions to run the plugin.