Table of Contents
- Building an IntelliJ Plugin: 1. Environment Setup
- Building an IntelliJ Plugin: 2. Define an Action
- Building an IntelliJ Plugin: 3. Build & Publish
Building an IntelliJ Plugin, Part 2
In the previous post, I created a plugin project in IntelliJ IDEA and walked through the structure. This time, I define an Action that runs the plugin.
Create an Action
Next, customize the IntelliJ UI so the action shows up in the toolbar and menus. The plugin needs an entry point so you can click a menu item to run it. This is what Action means. IntelliJ provides AnAction, and you can define your own action by extending it.
You can create an action by right-clicking the source directory as shown below.
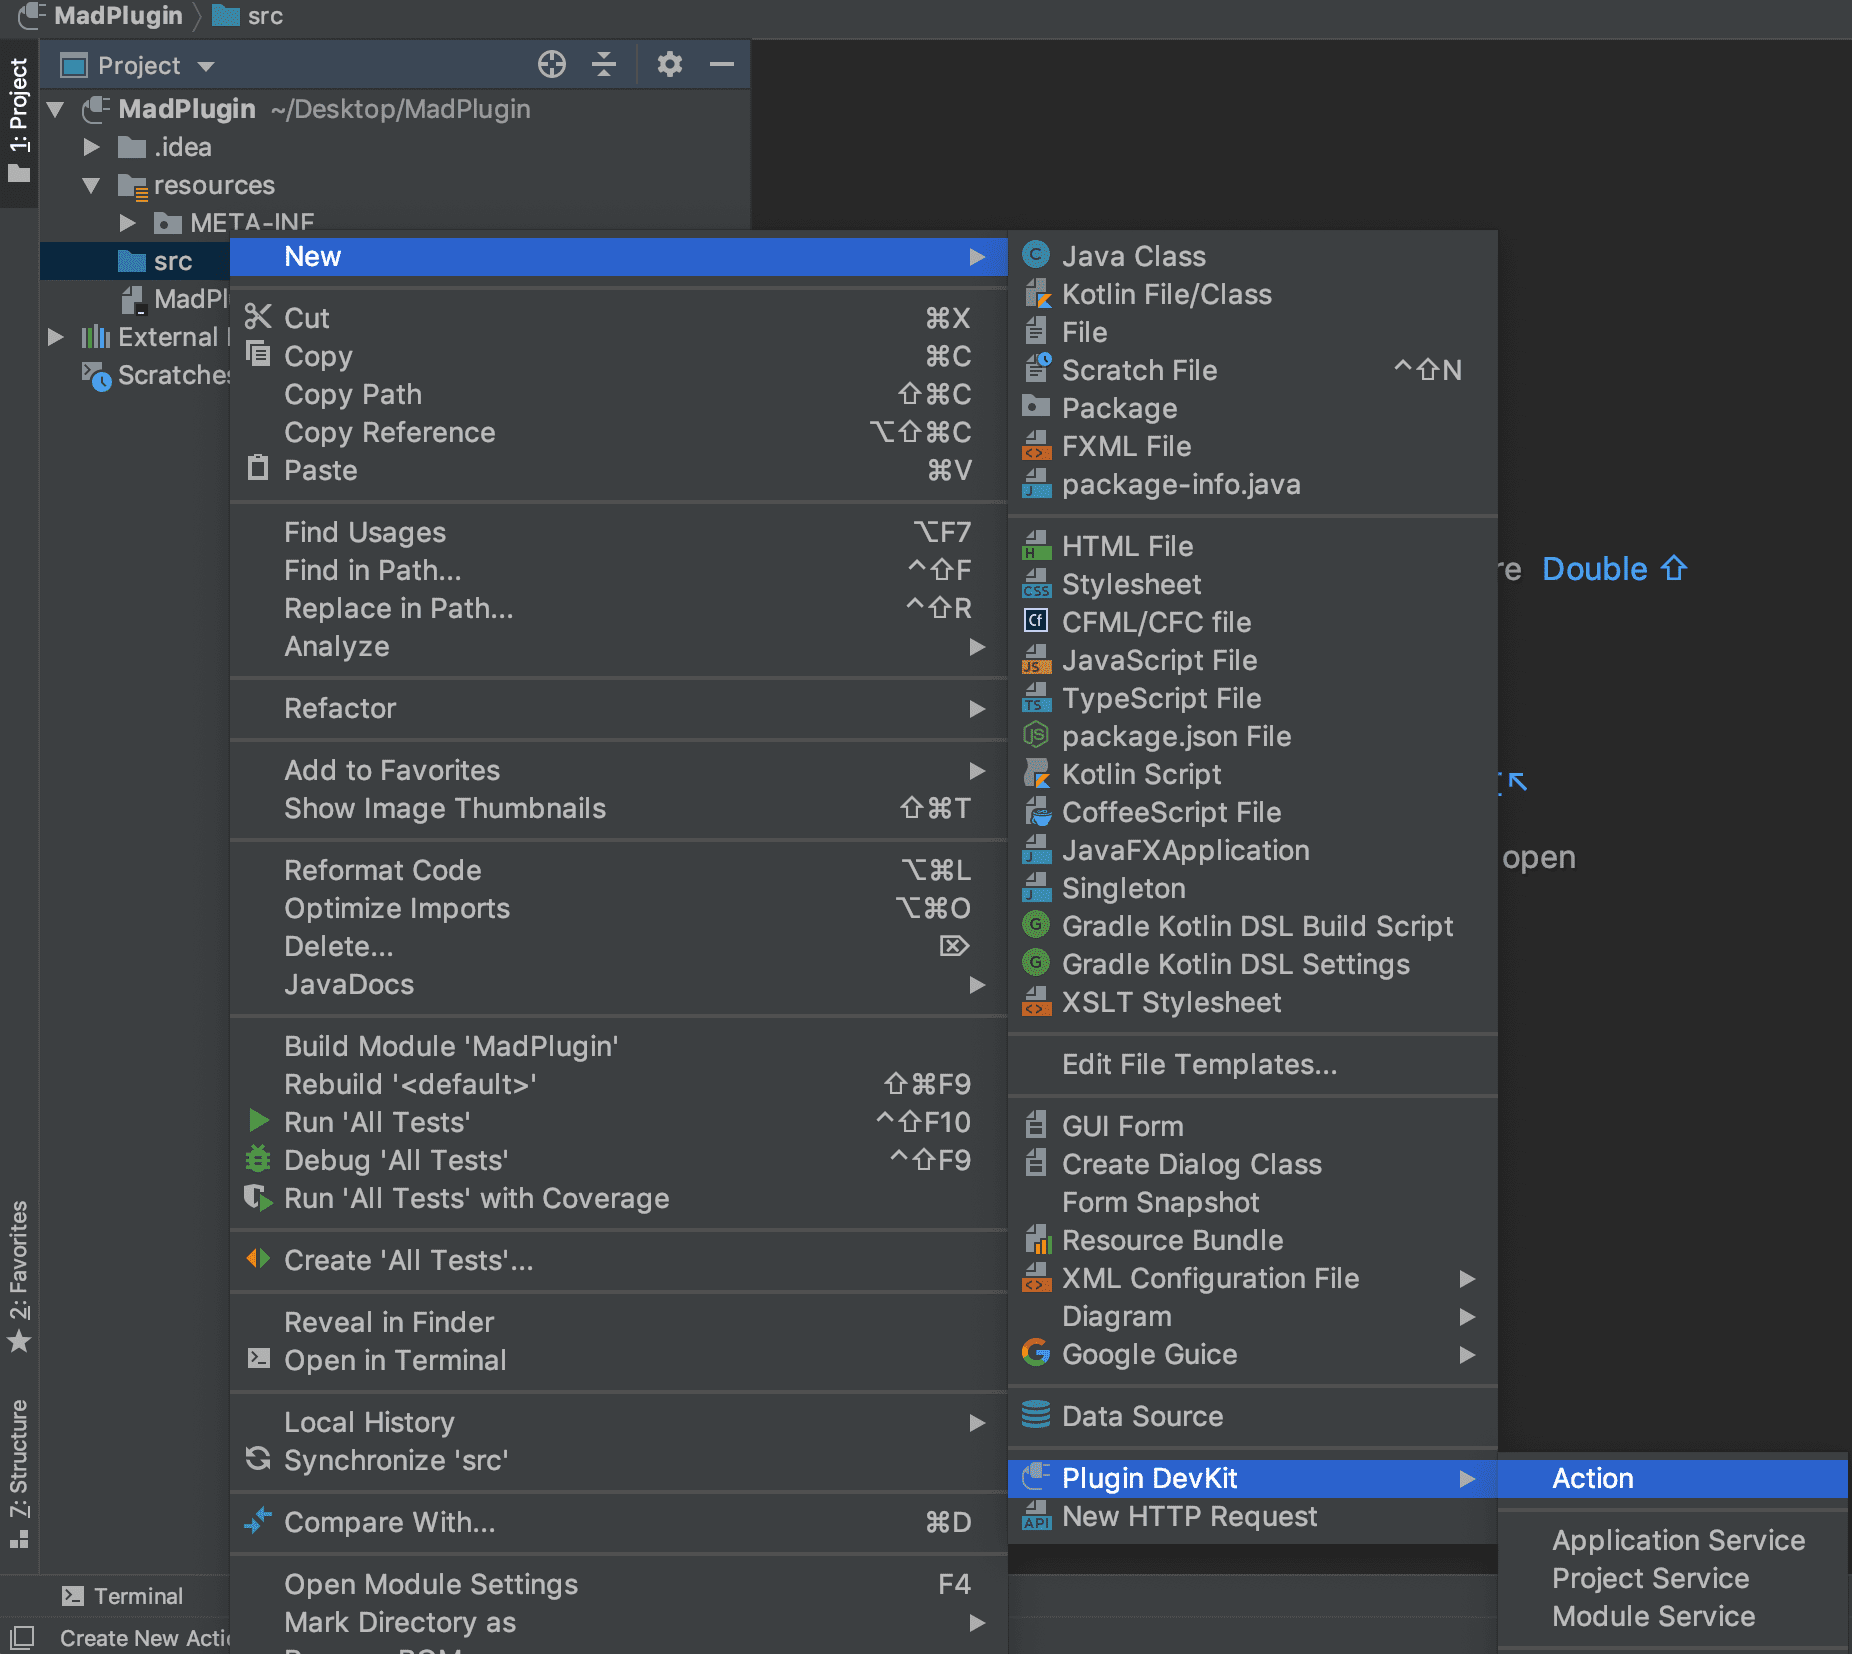
This is the screen where you enter the action details.
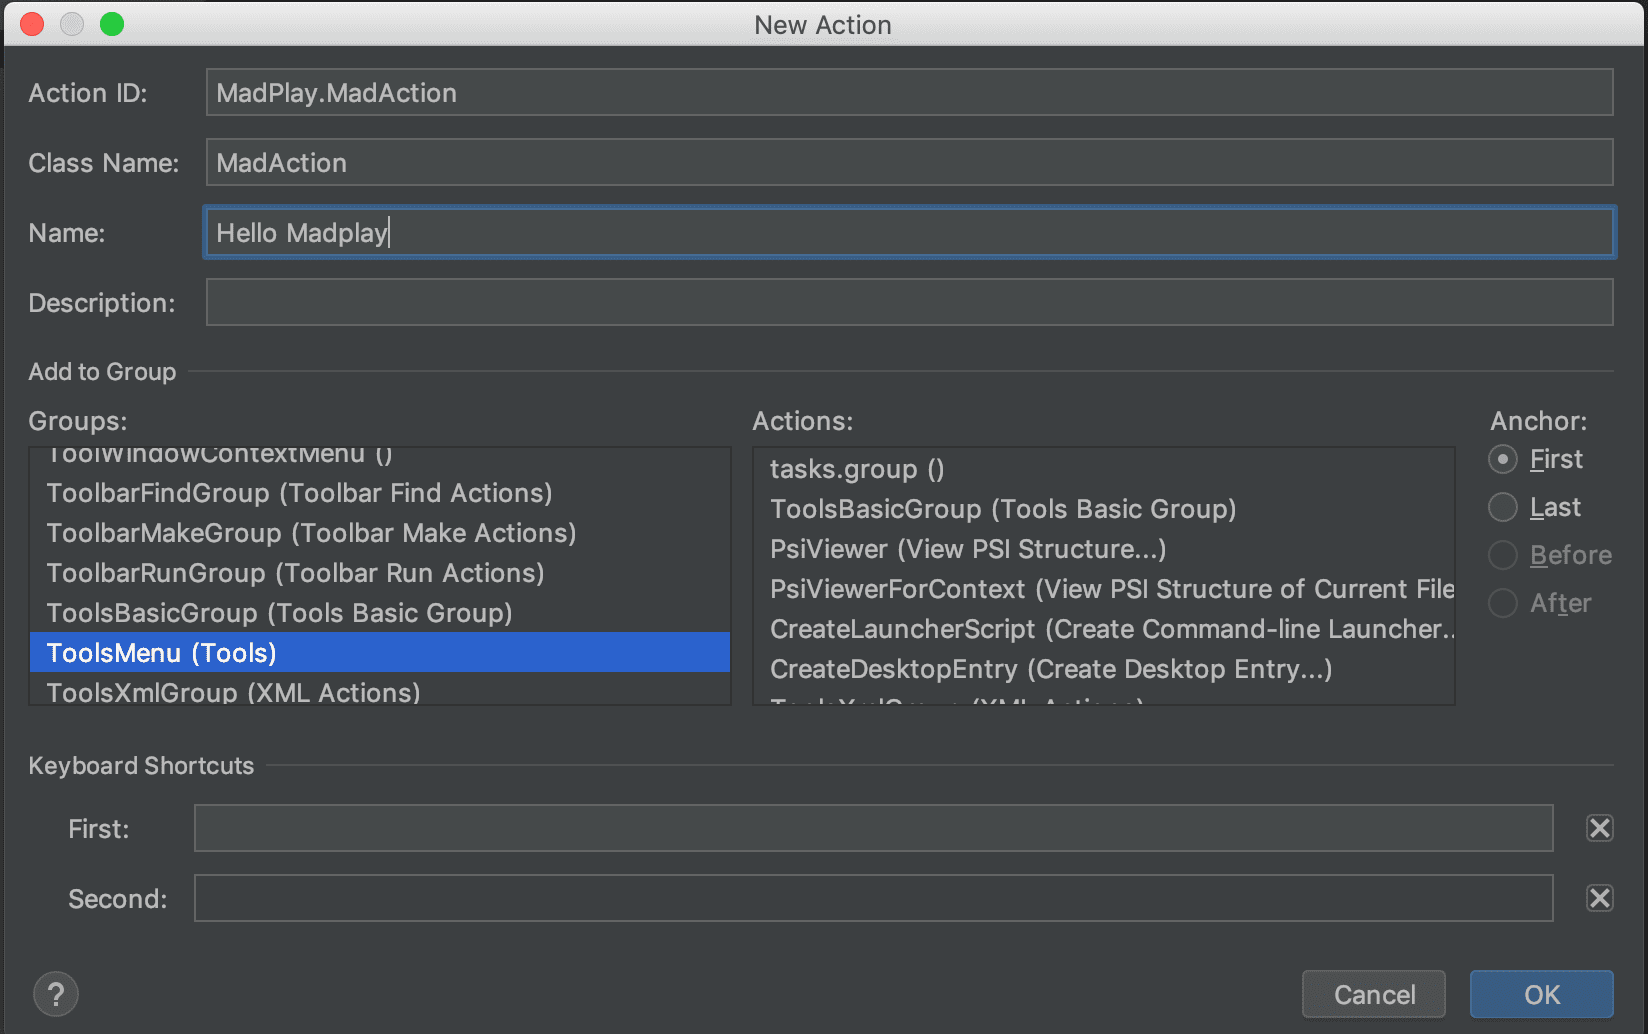
Here is what each field means:
- Action ID: A unique identifier. Use
PluginName.ActionId. - Class Name: The action class name.
- Name: The label shown in the menu. This also appears on the toolbar button.
- Description: An optional description.
- Groups: Choose which menu group to add it to. This example uses Tools in the top menu.
- Actions: Choose the position relative to existing actions in the group.
- If you do not select an action and choose First or Last, it is placed at the front or end of the group.
- Before and After place it right before or right after the selected action.
After you complete these fields, IntelliJ auto-generates the action class and registers it in META-INF/plugin.xml. You can also create the class and edit plugin.xml manually.
<actions>
  <action id="MadPlay.MadAction" class="MadAction" text="Hello Madplay">
    <add-to-group group-id="ToolsMenu" anchor="first"/>
  </action>
</actions>
Define the Action Behavior
Now define the action behavior. As mentioned, IntelliJ provides AnAction. Extend it and implement your custom behavior.
In this example, I just show a dialog.
import com.intellij.openapi.actionSystem.AnAction;
import com.intellij.openapi.actionSystem.AnActionEvent;
import com.intellij.openapi.ui.Messages;
/**
* @author Kimtaeng
* Created on 2019. 4. 9.
*/
public class MadAction extends AnAction {
@Override
public void actionPerformed(AnActionEvent e) {
// Use the IntelliJ Open API.
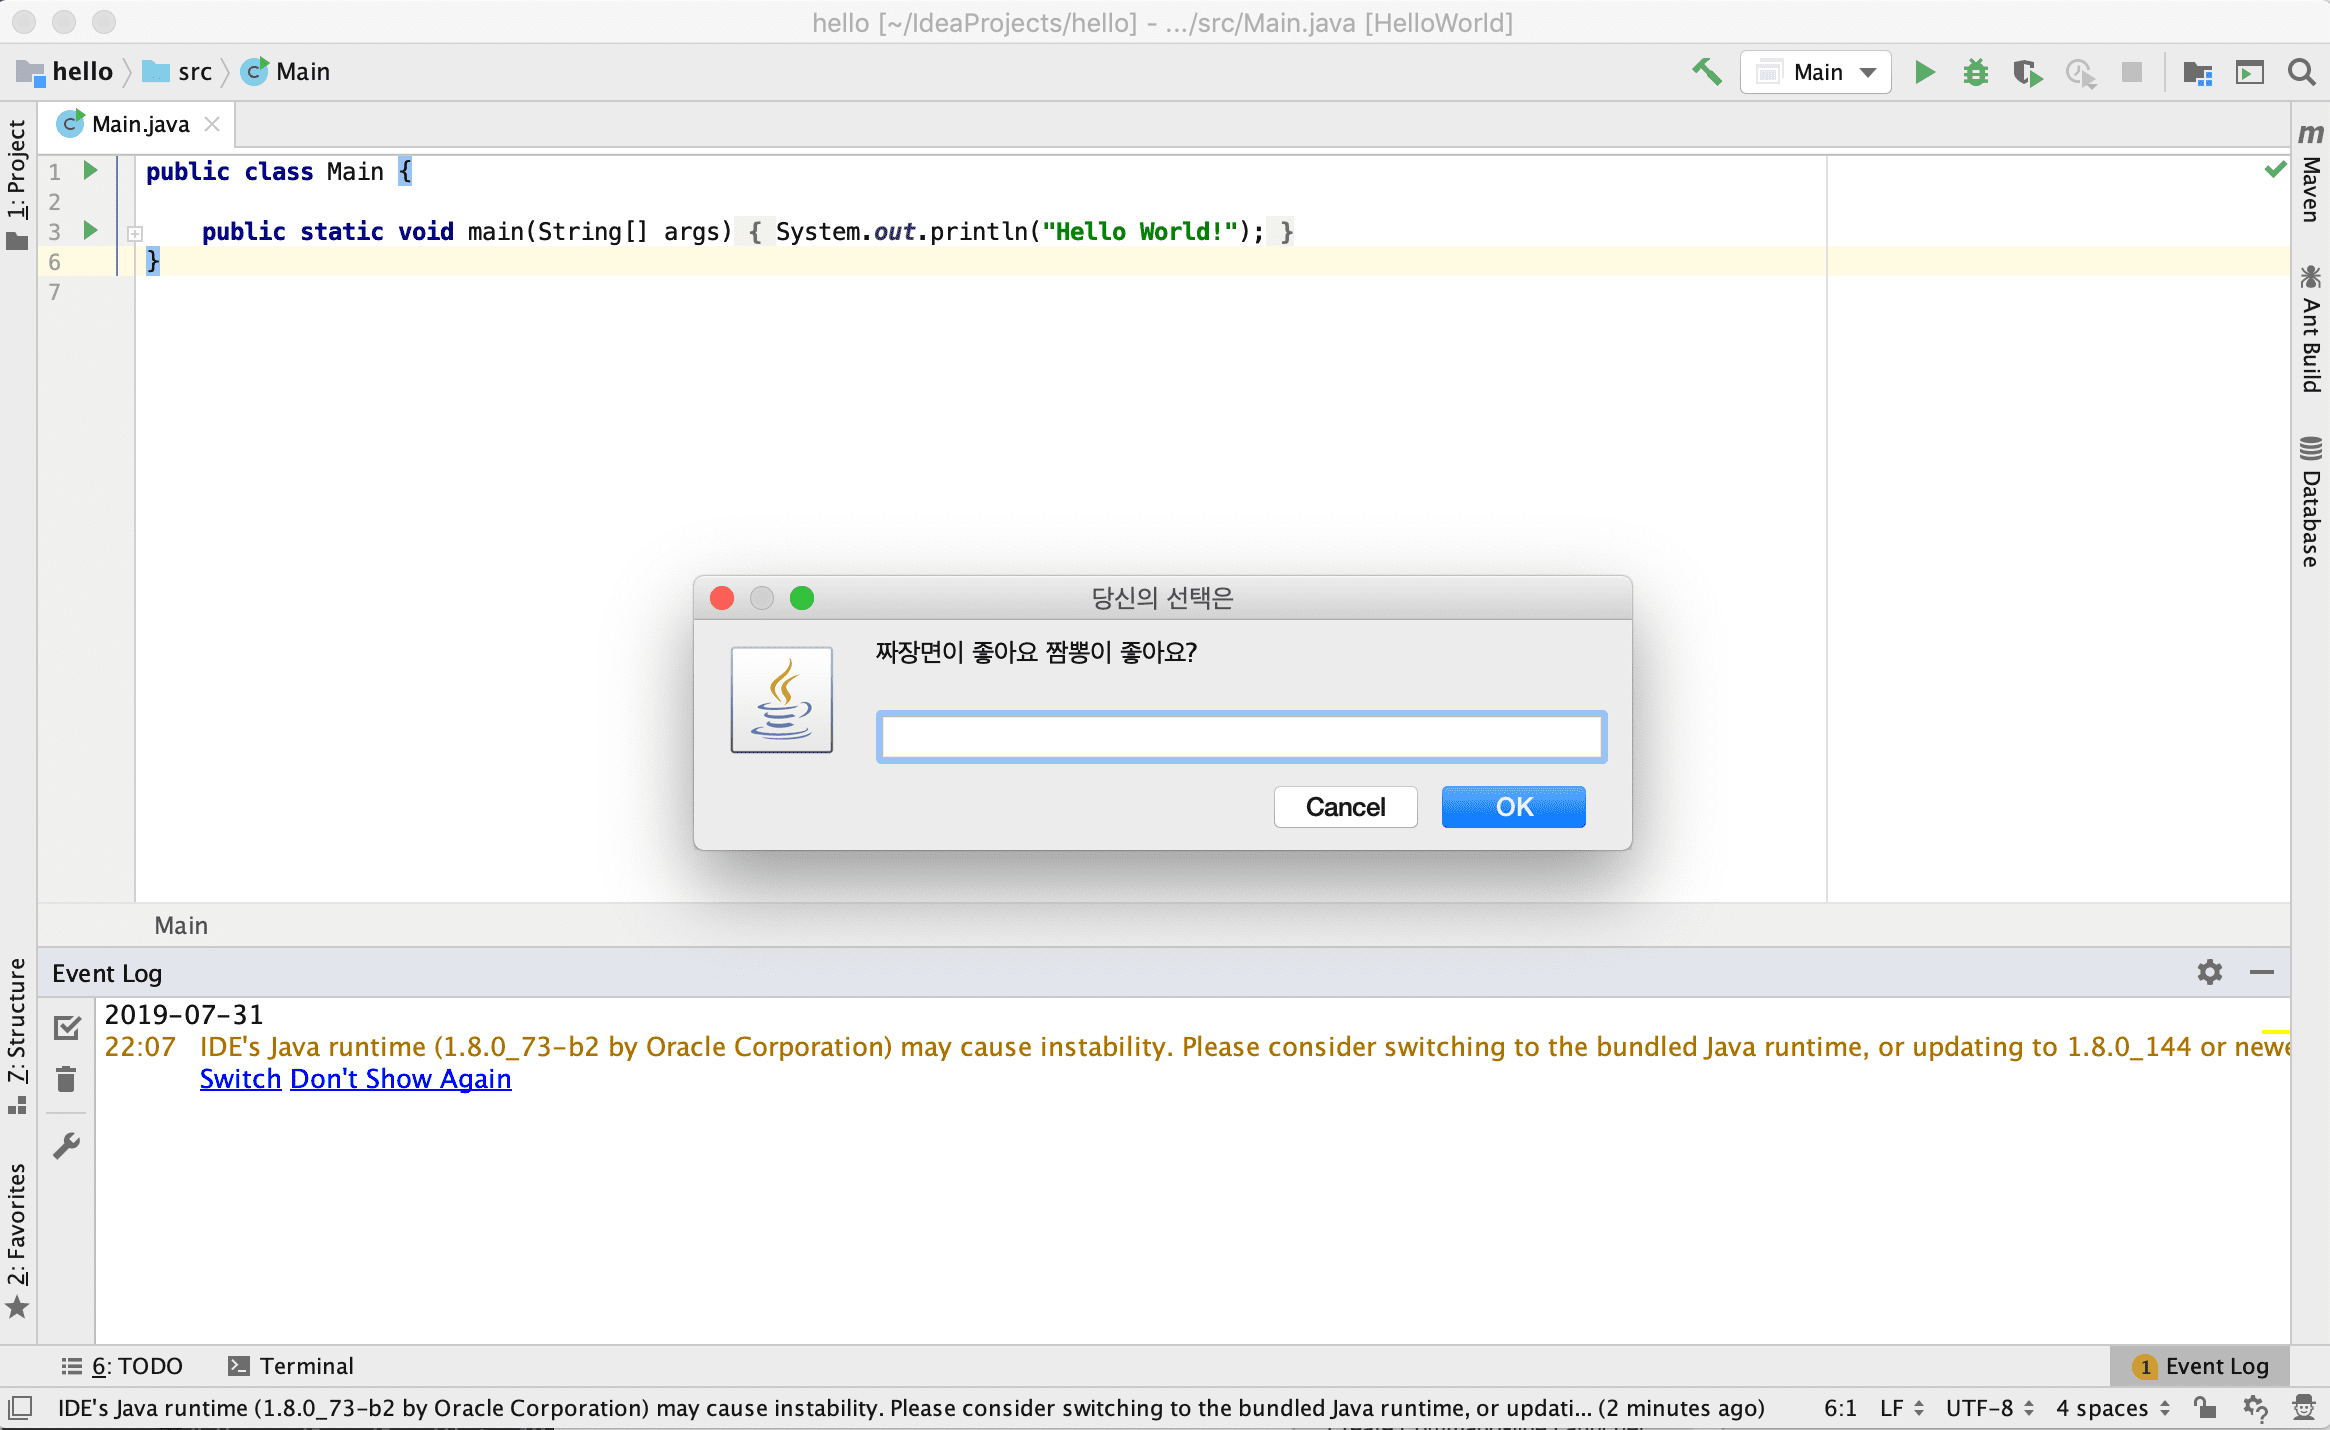
Messages.showInputDialog("Do you prefer jajangmyeon or jjamppong?", "Your choice", Messages.getQuestionIcon());
}
}
Run the Plugin
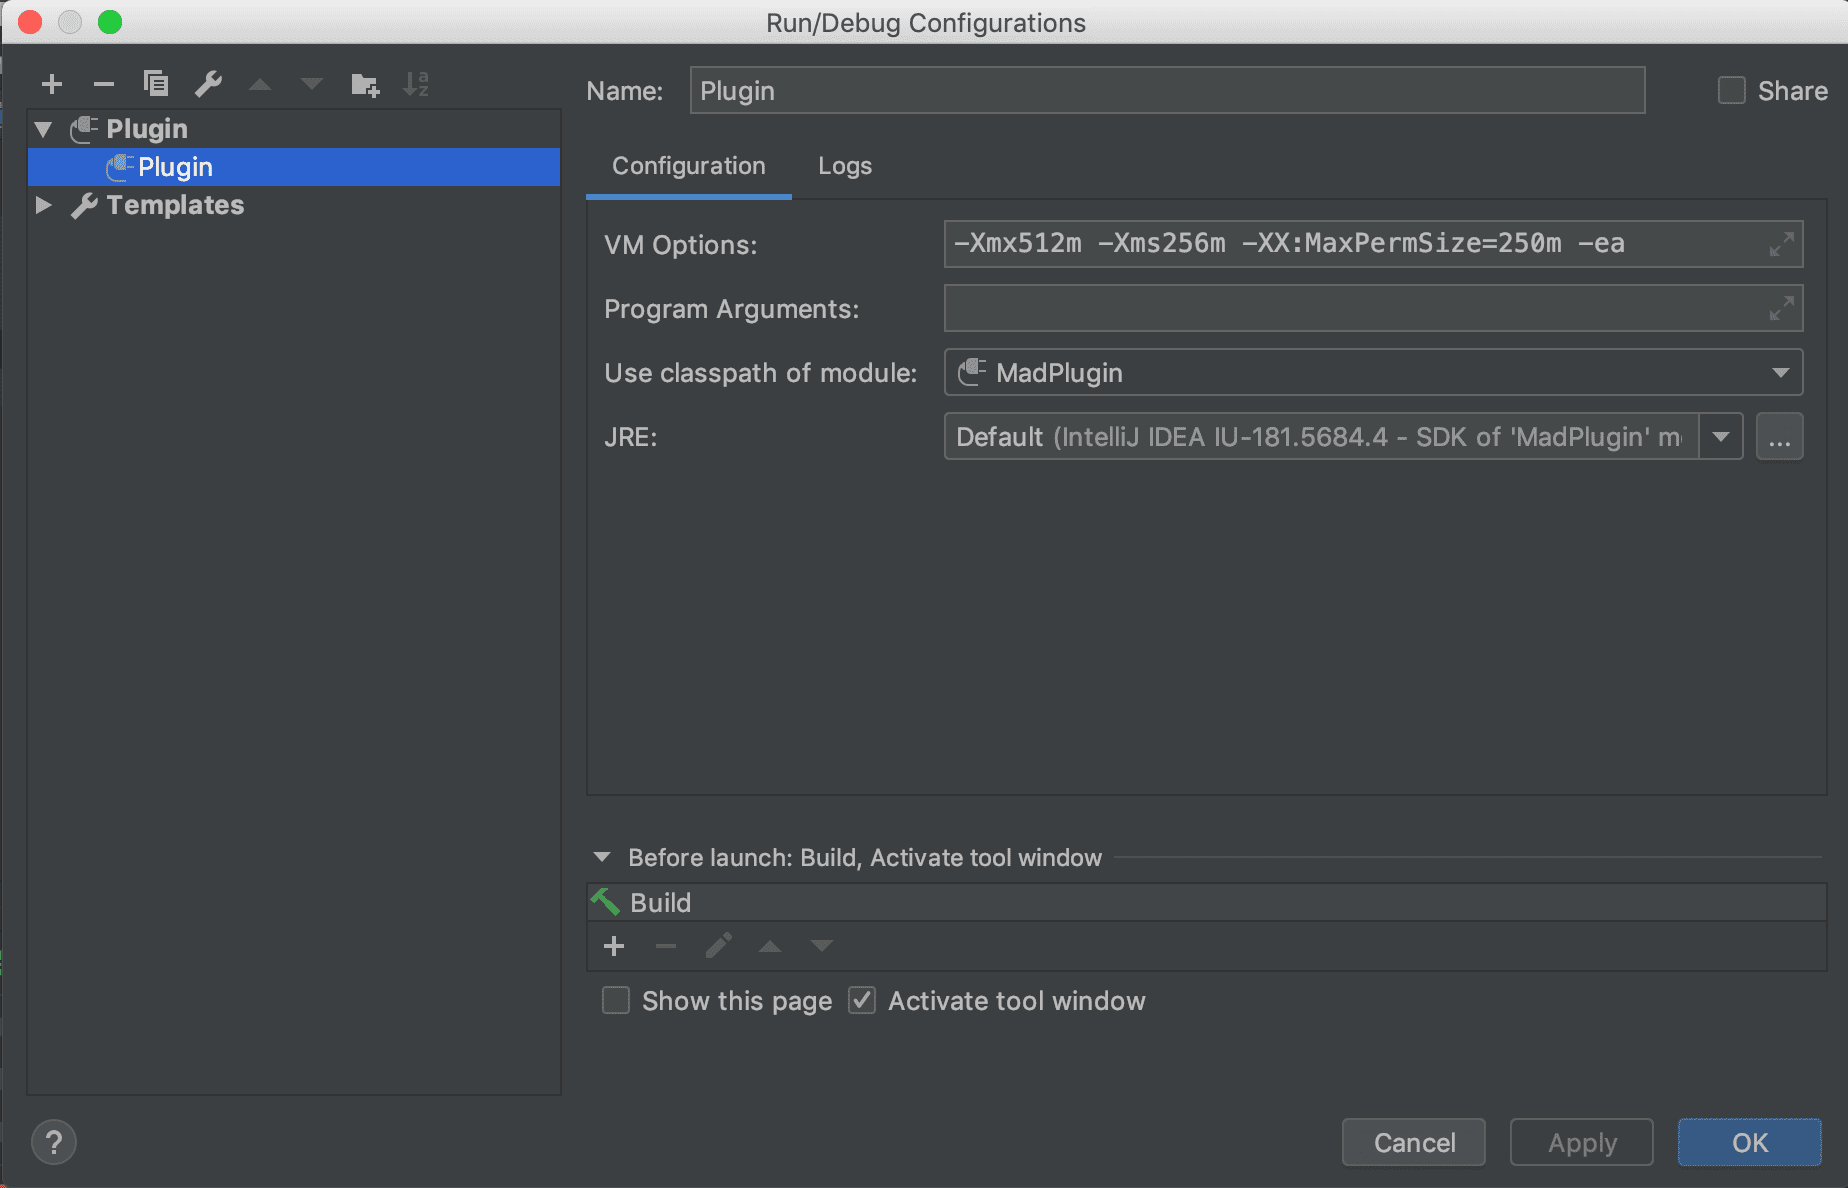
Let’s run the plugin and confirm the action works. While writing this post, IntelliJ auto-generated the run configuration. If it does not appear, set it up like this.
When you run the plugin with this configuration, a new IntelliJ IDEA instance launches. In that new instance, open the Tools menu and you will see the action you defined earlier.
Because the group is ToolsMenu and the anchor is First, the entry point appears at the top of the Tools menu.
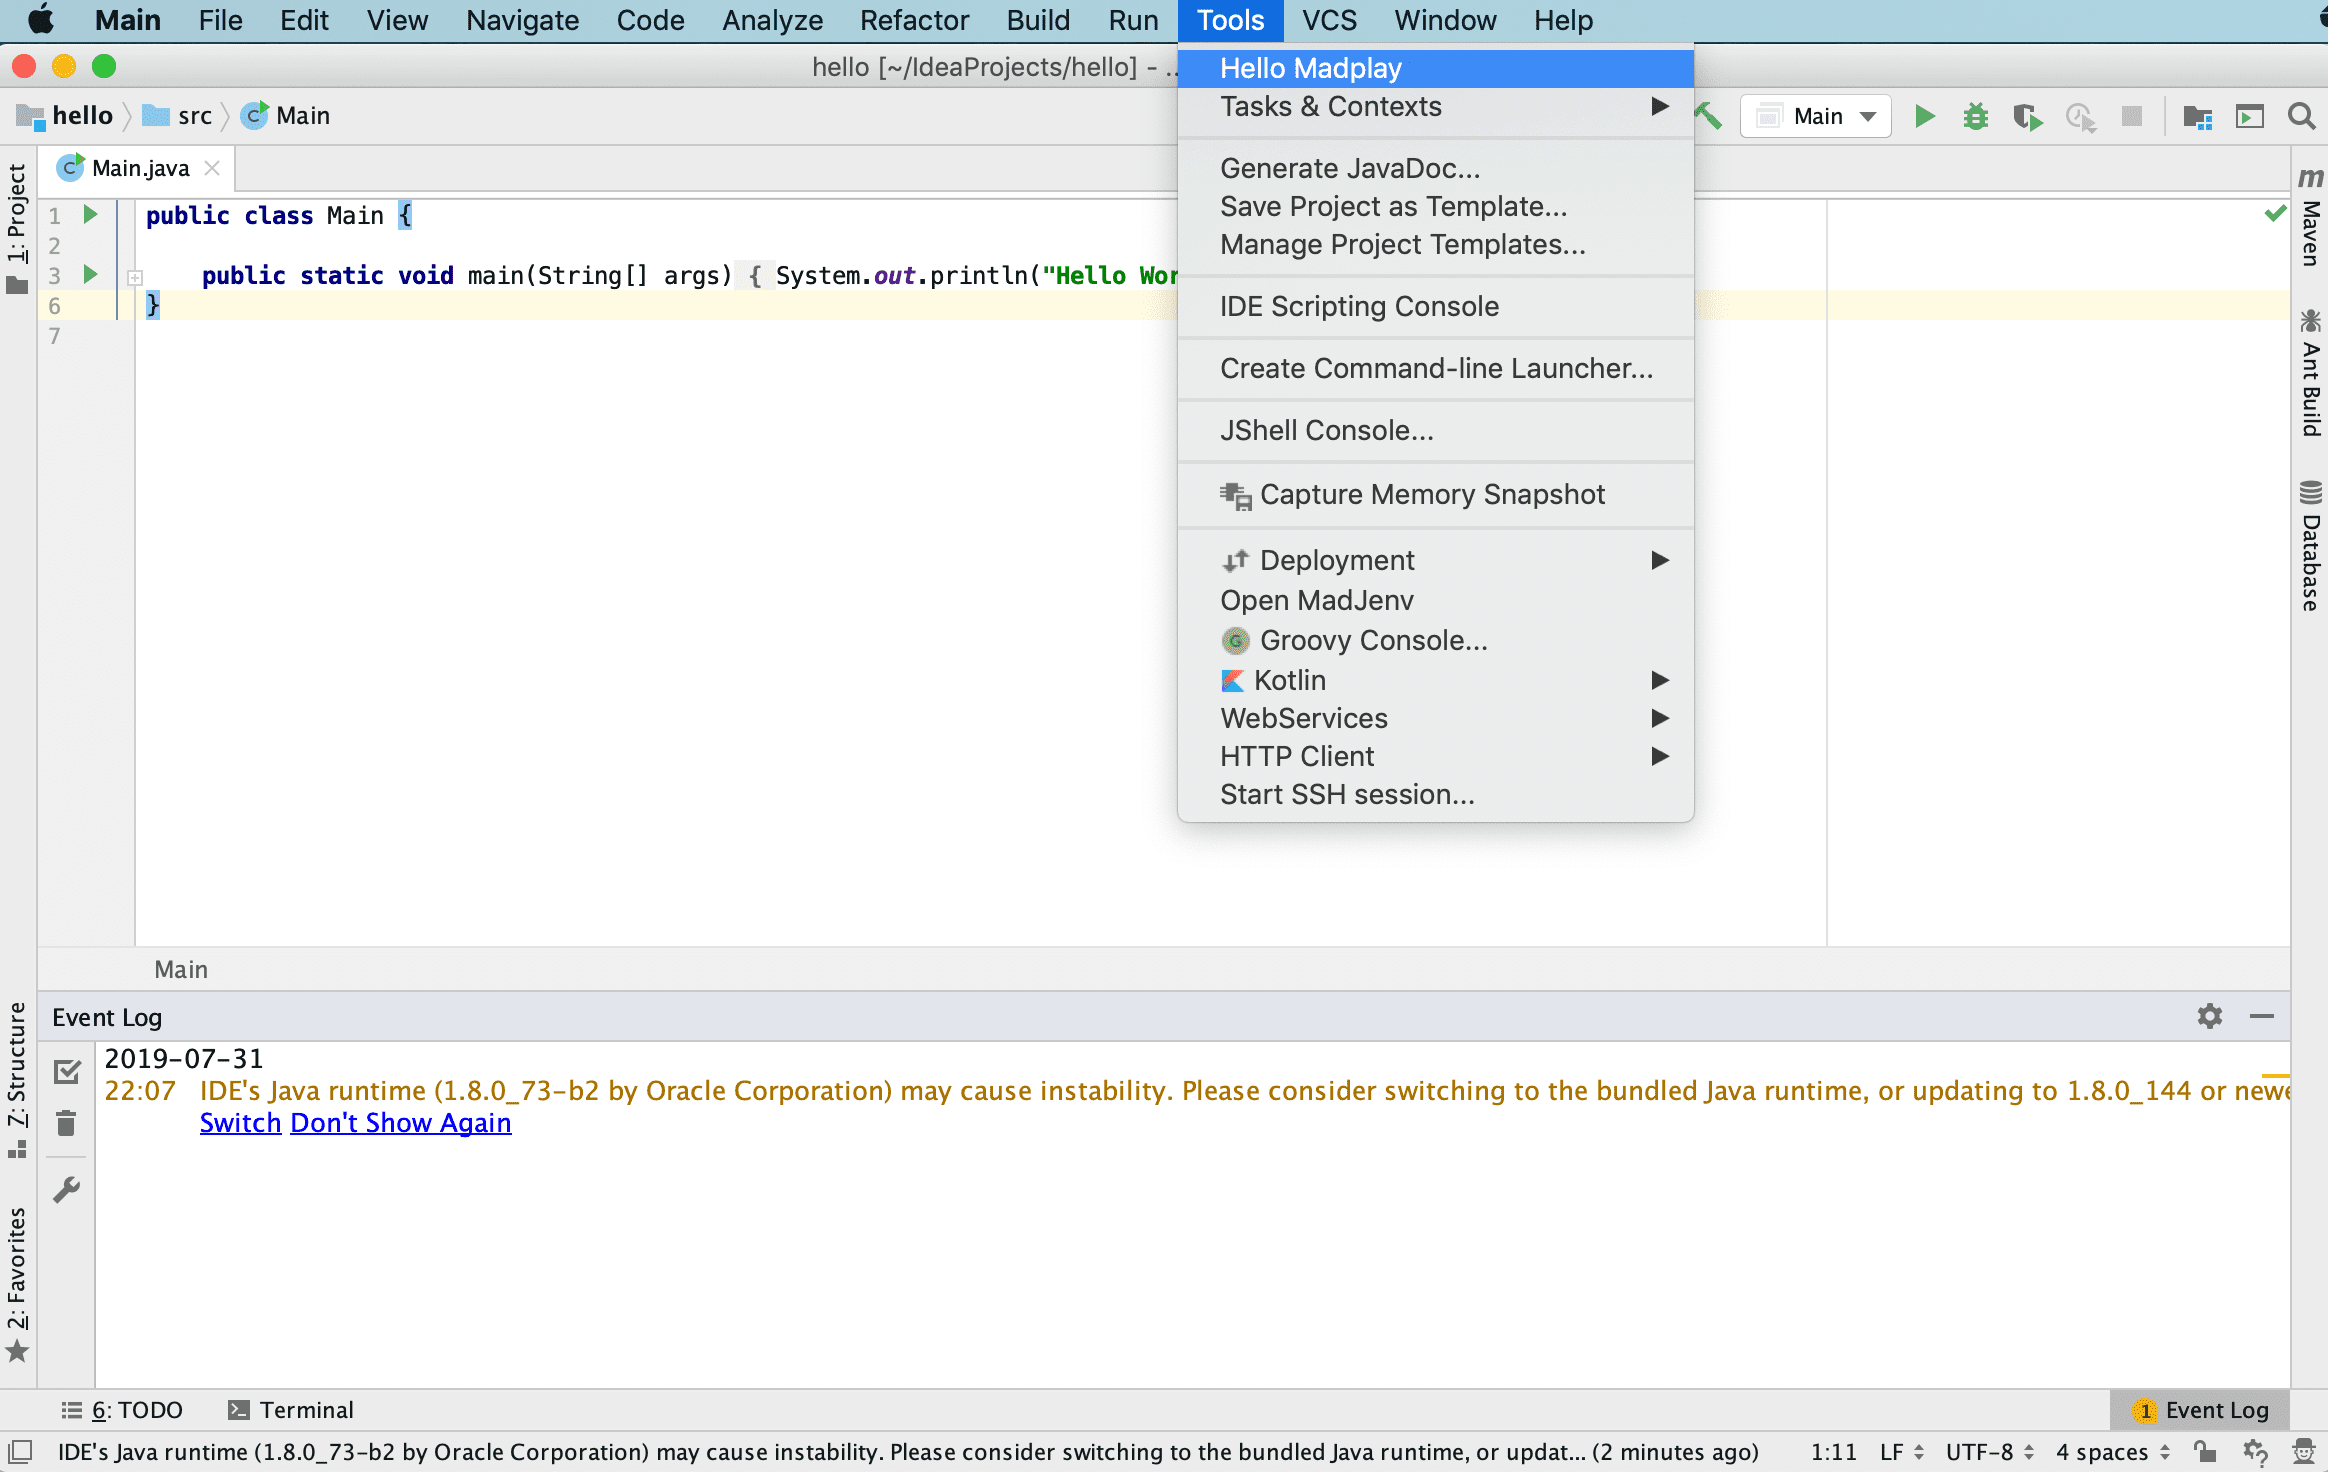
“Hello Madplay” is the action name you set during creation. Click it and confirm the dialog appears as shown below.
Next
So far, you created and defined a plugin action, then ran the plugin to verify it works.
In the next post, I cover how to publish the plugin to JetBrains Marketplace.