Getting Started With Kafka
Implementing Kafka Producer and Consumer in Java is simpler than expected. To run and verify the code, installing Kafka as described below. Kafka requires Zookeeper, so Zookeeper installation is also needed.
Installing kafka & zookeeper
brew install kafka
brew install zookeeper
zkServer start # zookeeper running
kafka-server-start /usr/local/etc/kafka/server.properties # kafka running
Creating kafka topic
# replication-factor : number of replicas (1)
# partitions : number of partitions (1)
# topic : topic name (taeng)
$ kafka-topics --create --zookeeper localhost:2181 \
      --replication-factor 1 --partitions 1 --topic taeng
Kafka implementation setup is complete. This is minimal setup for examining simple examples. In production, we don’t use single-node systems like this. Note: This post doesn’t cover theoretical aspects of Kafka or Zookeeper in detail.
Implementing Kafka Producer
This example reads keyboard input and sends messages. In production, connection management for Kafka transmission would be strictly controlled, but for this simple example, terminating connections when specific messages are entered.
/**
 * Kafka Producer.
 * Sends messages through keyboard input.
 *
 * @author Kimtaeng
 * Created on 2018. 9. 10.
 */
public class MyKafkaProducer {
    private static final String TOPIC_NAME = "taeng";
    private static final String FIN_MESSAGE = "exit";

    public static void main(String[] args) {
        Properties properties = new Properties();
        properties.put(ProducerConfig.BOOTSTRAP_SERVERS_CONFIG, "localhost:9092");
        properties.put(ProducerConfig.KEY_SERIALIZER_CLASS_CONFIG, StringSerializer.class.getName());
        properties.put(ProducerConfig.VALUE_SERIALIZER_CLASS_CONFIG, StringSerializer.class.getName());

        KafkaProducer<String, String> producer = new KafkaProducer<>(properties);

        while(true) {
            Scanner sc = new Scanner(System.in);
            System.out.print("Input > ");
            String message = sc.nextLine();

            ProducerRecord<String, String> record = new ProducerRecord<>(TOPIC_NAME, message);
            try {
                producer.send(record, (metadata, exception) -> {
                    if (exception != null) {
                        // some exception
                    }
                });

            } catch (Exception e) {
                // exception
            } finally {
                producer.flush();
            }

            if(StringUtils.equals(message, FIN_MESSAGE)) {
                producer.close();
                break;
            }
        }
    }
}
Implementing Kafka Consumer
For the Consumer, after subscribing, consuming records through polling.
Topics can be specified as Lists, i.e., multiple topics are supported.
The poll method’s parameter is the maximum blocking time to wait for records.
Similar to the Producer, terminating when specific messages are received.
/**
 * Kafka Consumer.
 * Receives messages sent by Producer.
 *
 * @author Kimtaeng
 * Created on 2018. 9. 10.
 */
public class MyKafkaConsumer {
    private static final String TOPIC_NAME = "taeng";
    private static final String FIN_MESSAGE = "exit";

    public static void main(String[] args) {
        Properties properties = new Properties();
        properties.put(ConsumerConfig.BOOTSTRAP_SERVERS_CONFIG, "localhost:9092");
        properties.put(ConsumerConfig.KEY_DESERIALIZER_CLASS_CONFIG, StringDeserializer.class.getName());
        properties.put(ConsumerConfig.VALUE_DESERIALIZER_CLASS_CONFIG, StringDeserializer.class.getName());
        properties.put(ConsumerConfig.GROUP_ID_CONFIG, TOPIC_NAME);

        KafkaConsumer<String, String> consumer = new KafkaConsumer<>(properties);
        consumer.subscribe(Collections.singletonList(TOPIC_NAME));

        String message = null;
        try {
            do {
                ConsumerRecords<String, String> records = consumer.poll(Duration.ofMillis(100000));

                for (ConsumerRecord<String, String> record : records) {
                    message = record.value();
                    System.out.println(message);
                }
            } while (!StringUtils.equals(message, FIN_MESSAGE));
        } catch(Exception e) {
            // exception
        } finally {
            consumer.close();
        }
    }
}
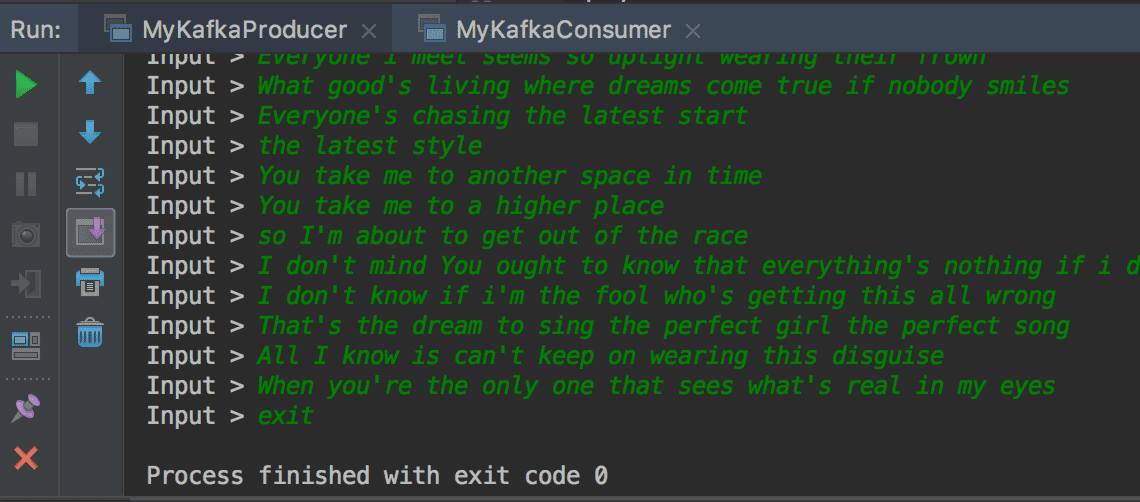
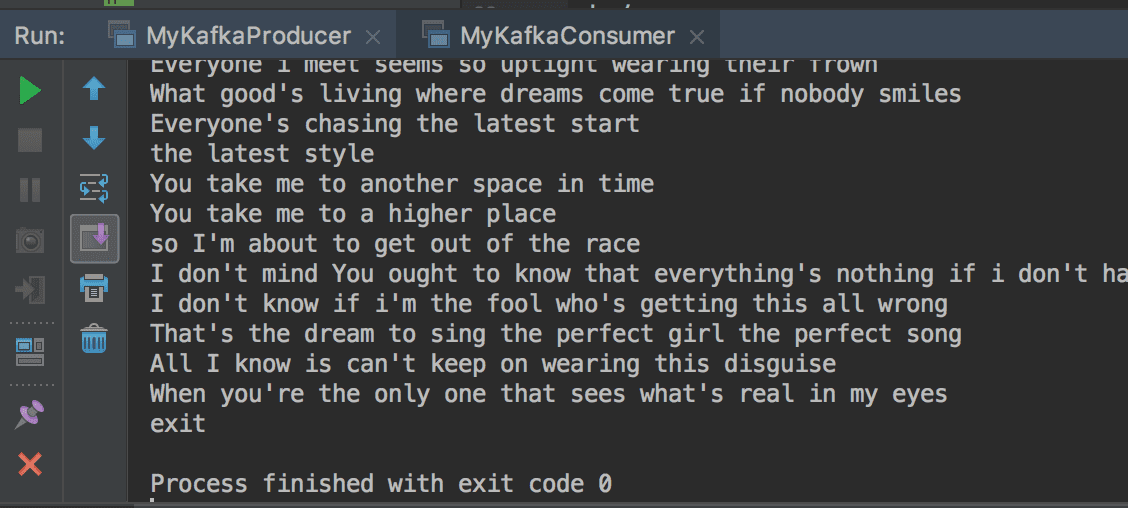
Running the Code
Starting the Consumer first, then the Producer. When entering messages through keyboard input in the Producer, seeing sent messages on the Consumer’s console screen.
Implementing and executing Kafka Producer and Consumer in Java. Beyond what we’ve covered in the example code above, there are many more configuration options. Learning about these settings in the following post.