Development Environment
Updated as of February 2020. Depending on timing, details may differ, so verify versions.
- macOS Mojave
- Java 11
- Spring 5.2.4
- Tomcat 9.0.33
- Maven 3.6.1
- IntelliJ IDEA Ultimate 2019.3
Create the Project
Let’s create a Spring MVC project in IntelliJ IDEA step by step.
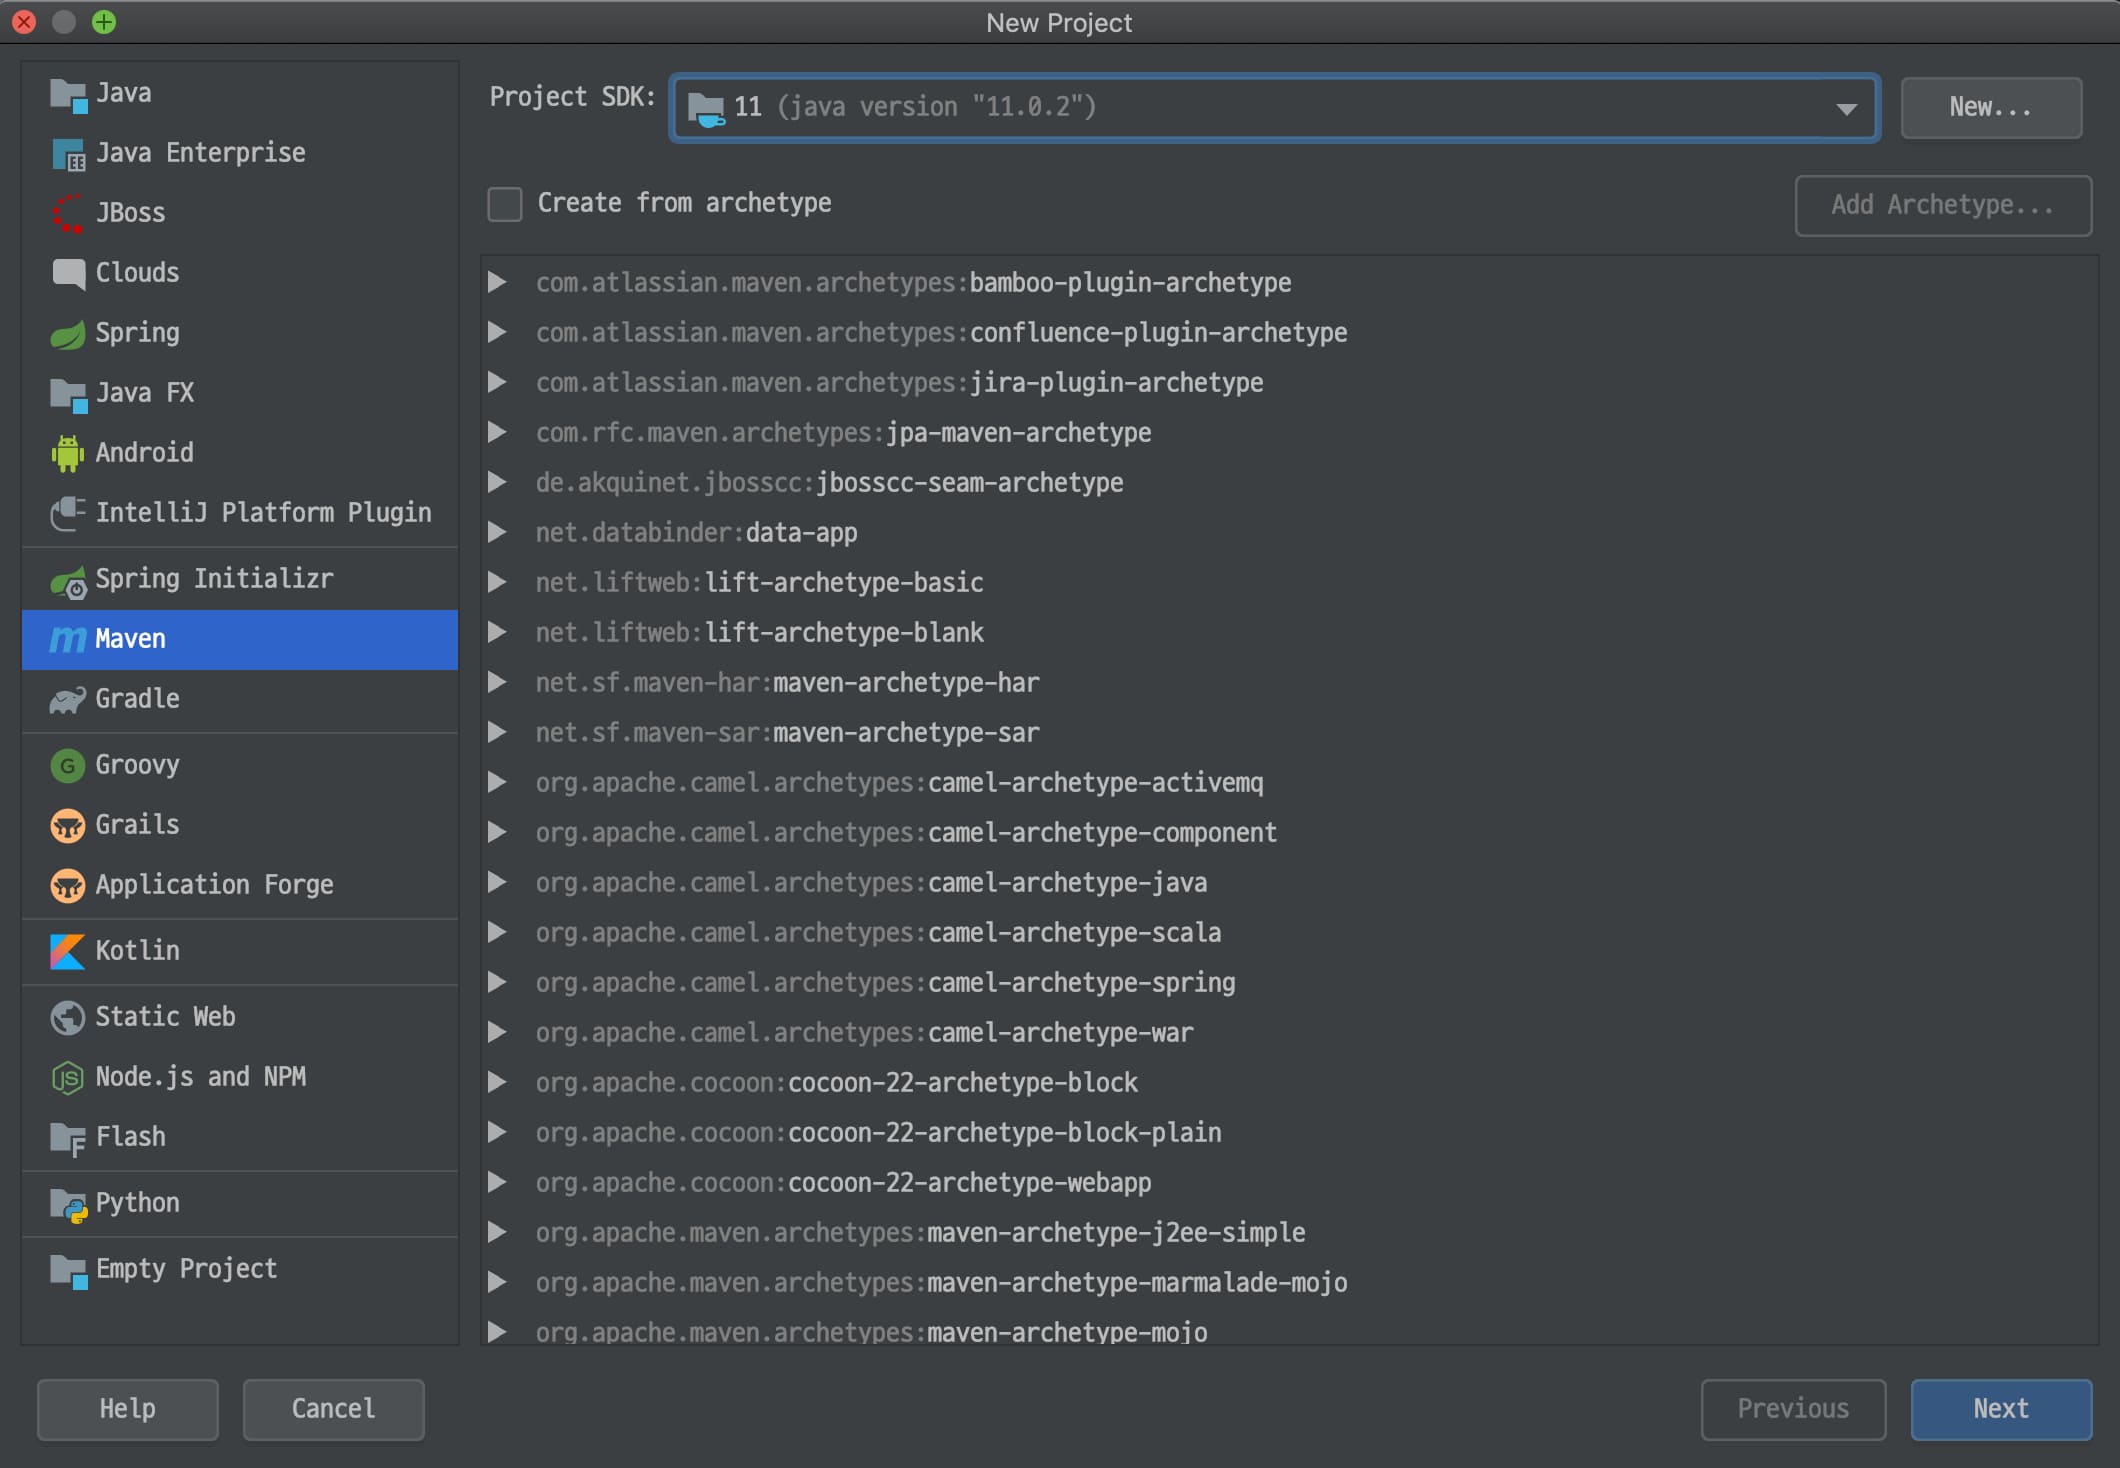
New Project
- Select
New > Project > Maven.
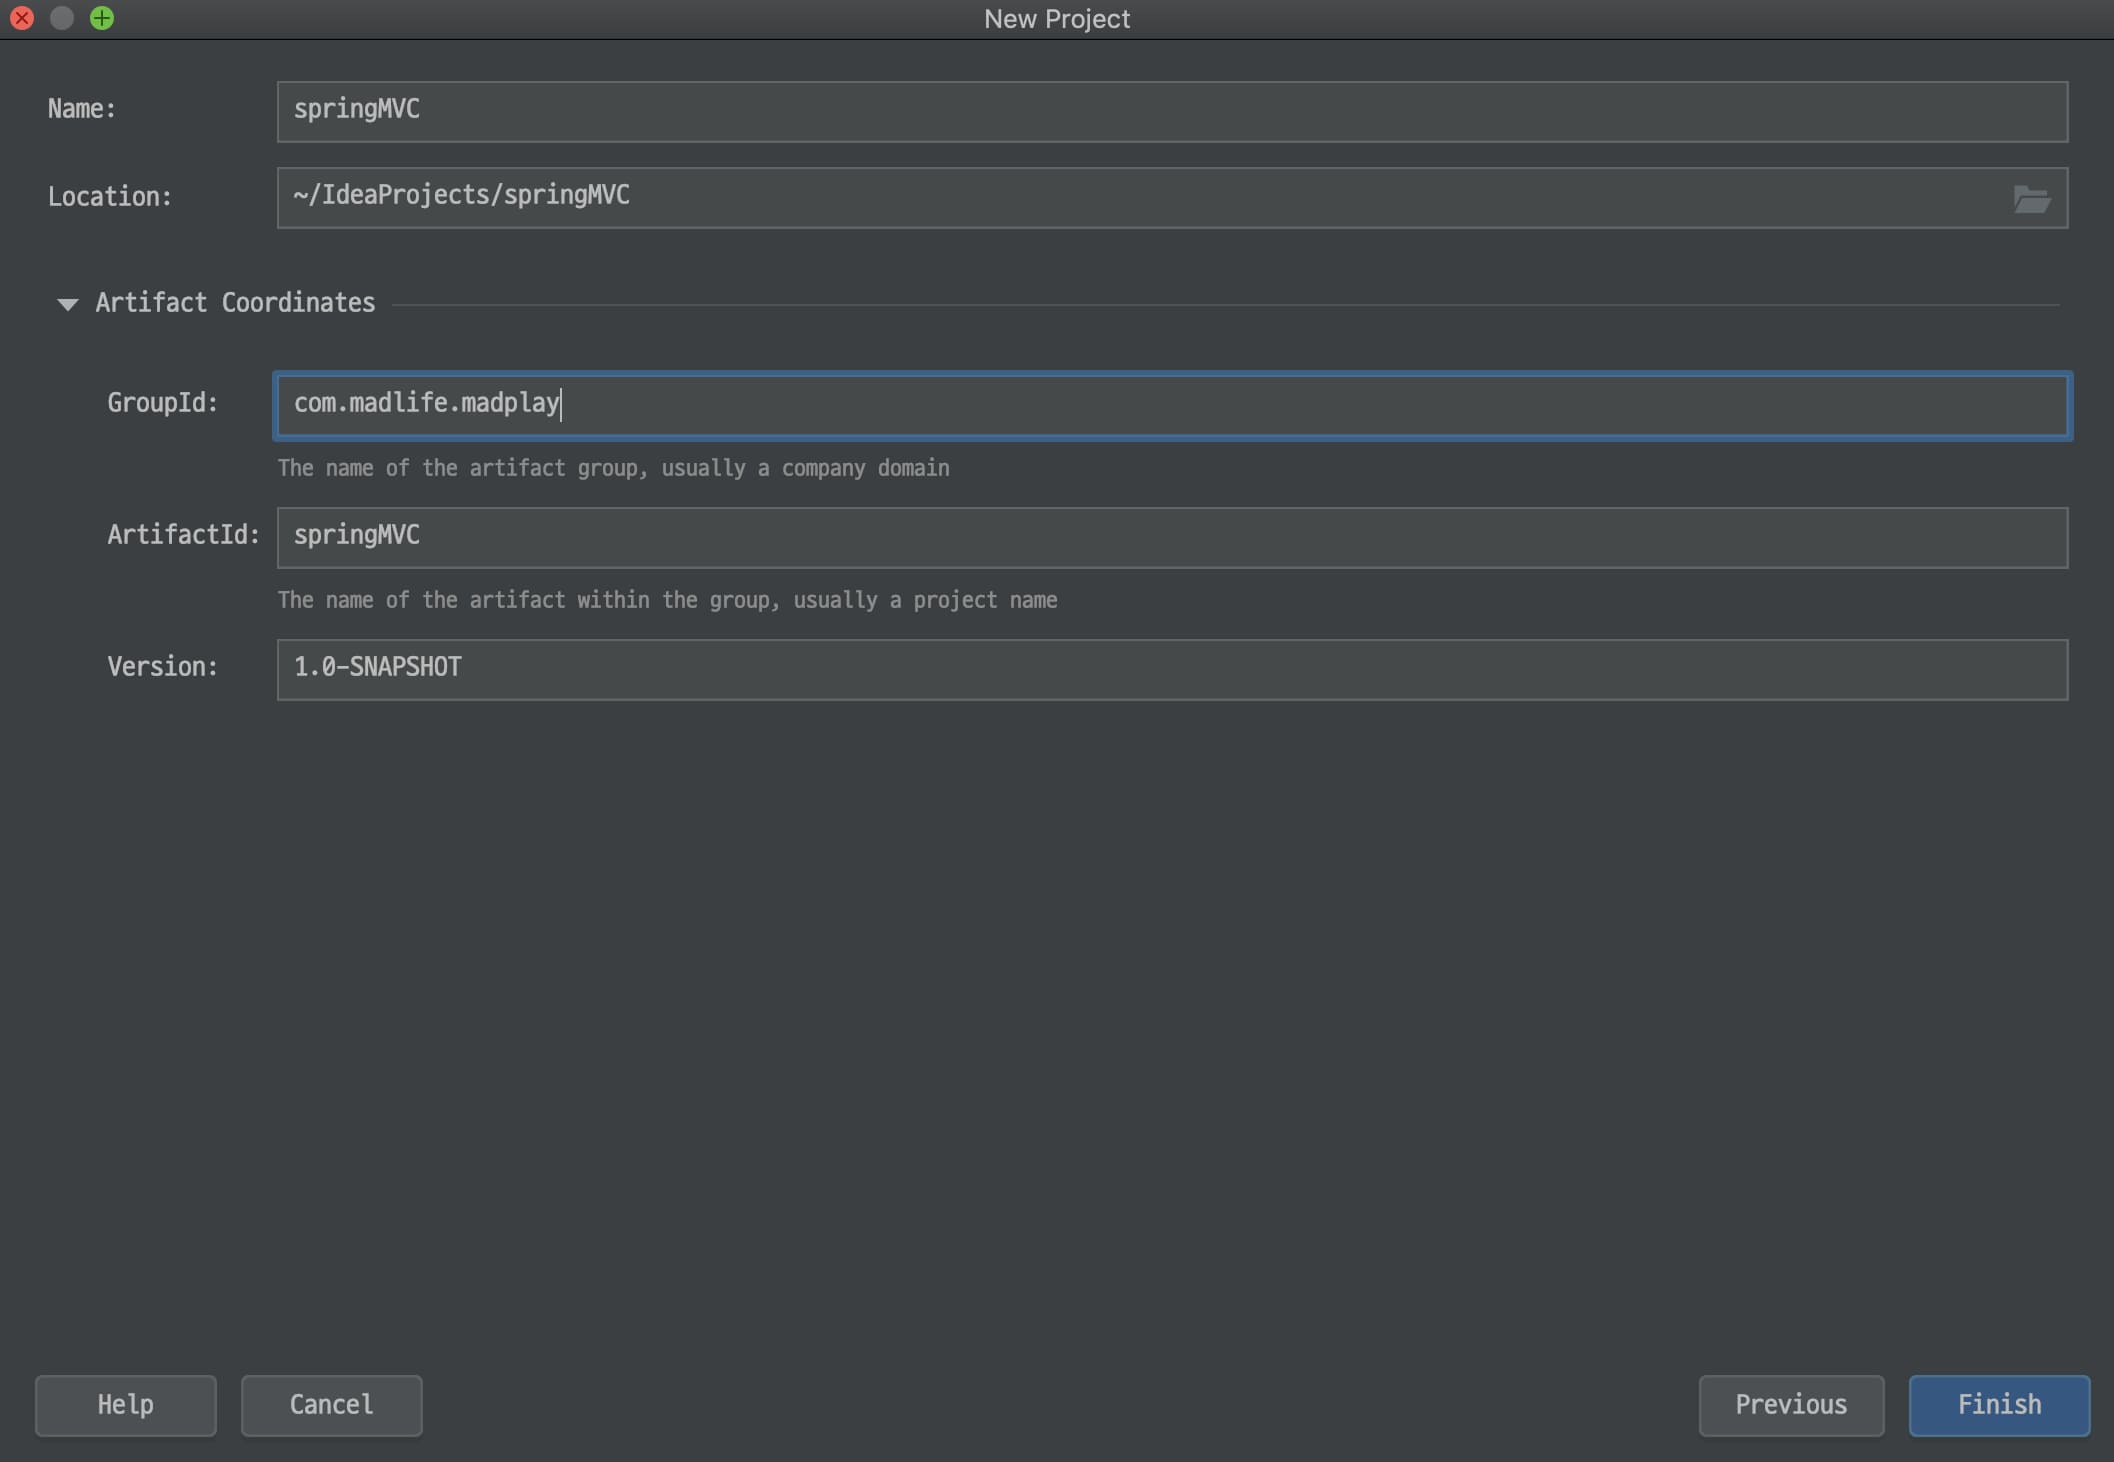
Name and Location
- Set the project name and path as you prefer.
- You can skip the artifact details.
GroupIdtypically uses the company domain in reverse.ArtifactIdusually matches the project name.Versionrepresents the project version.
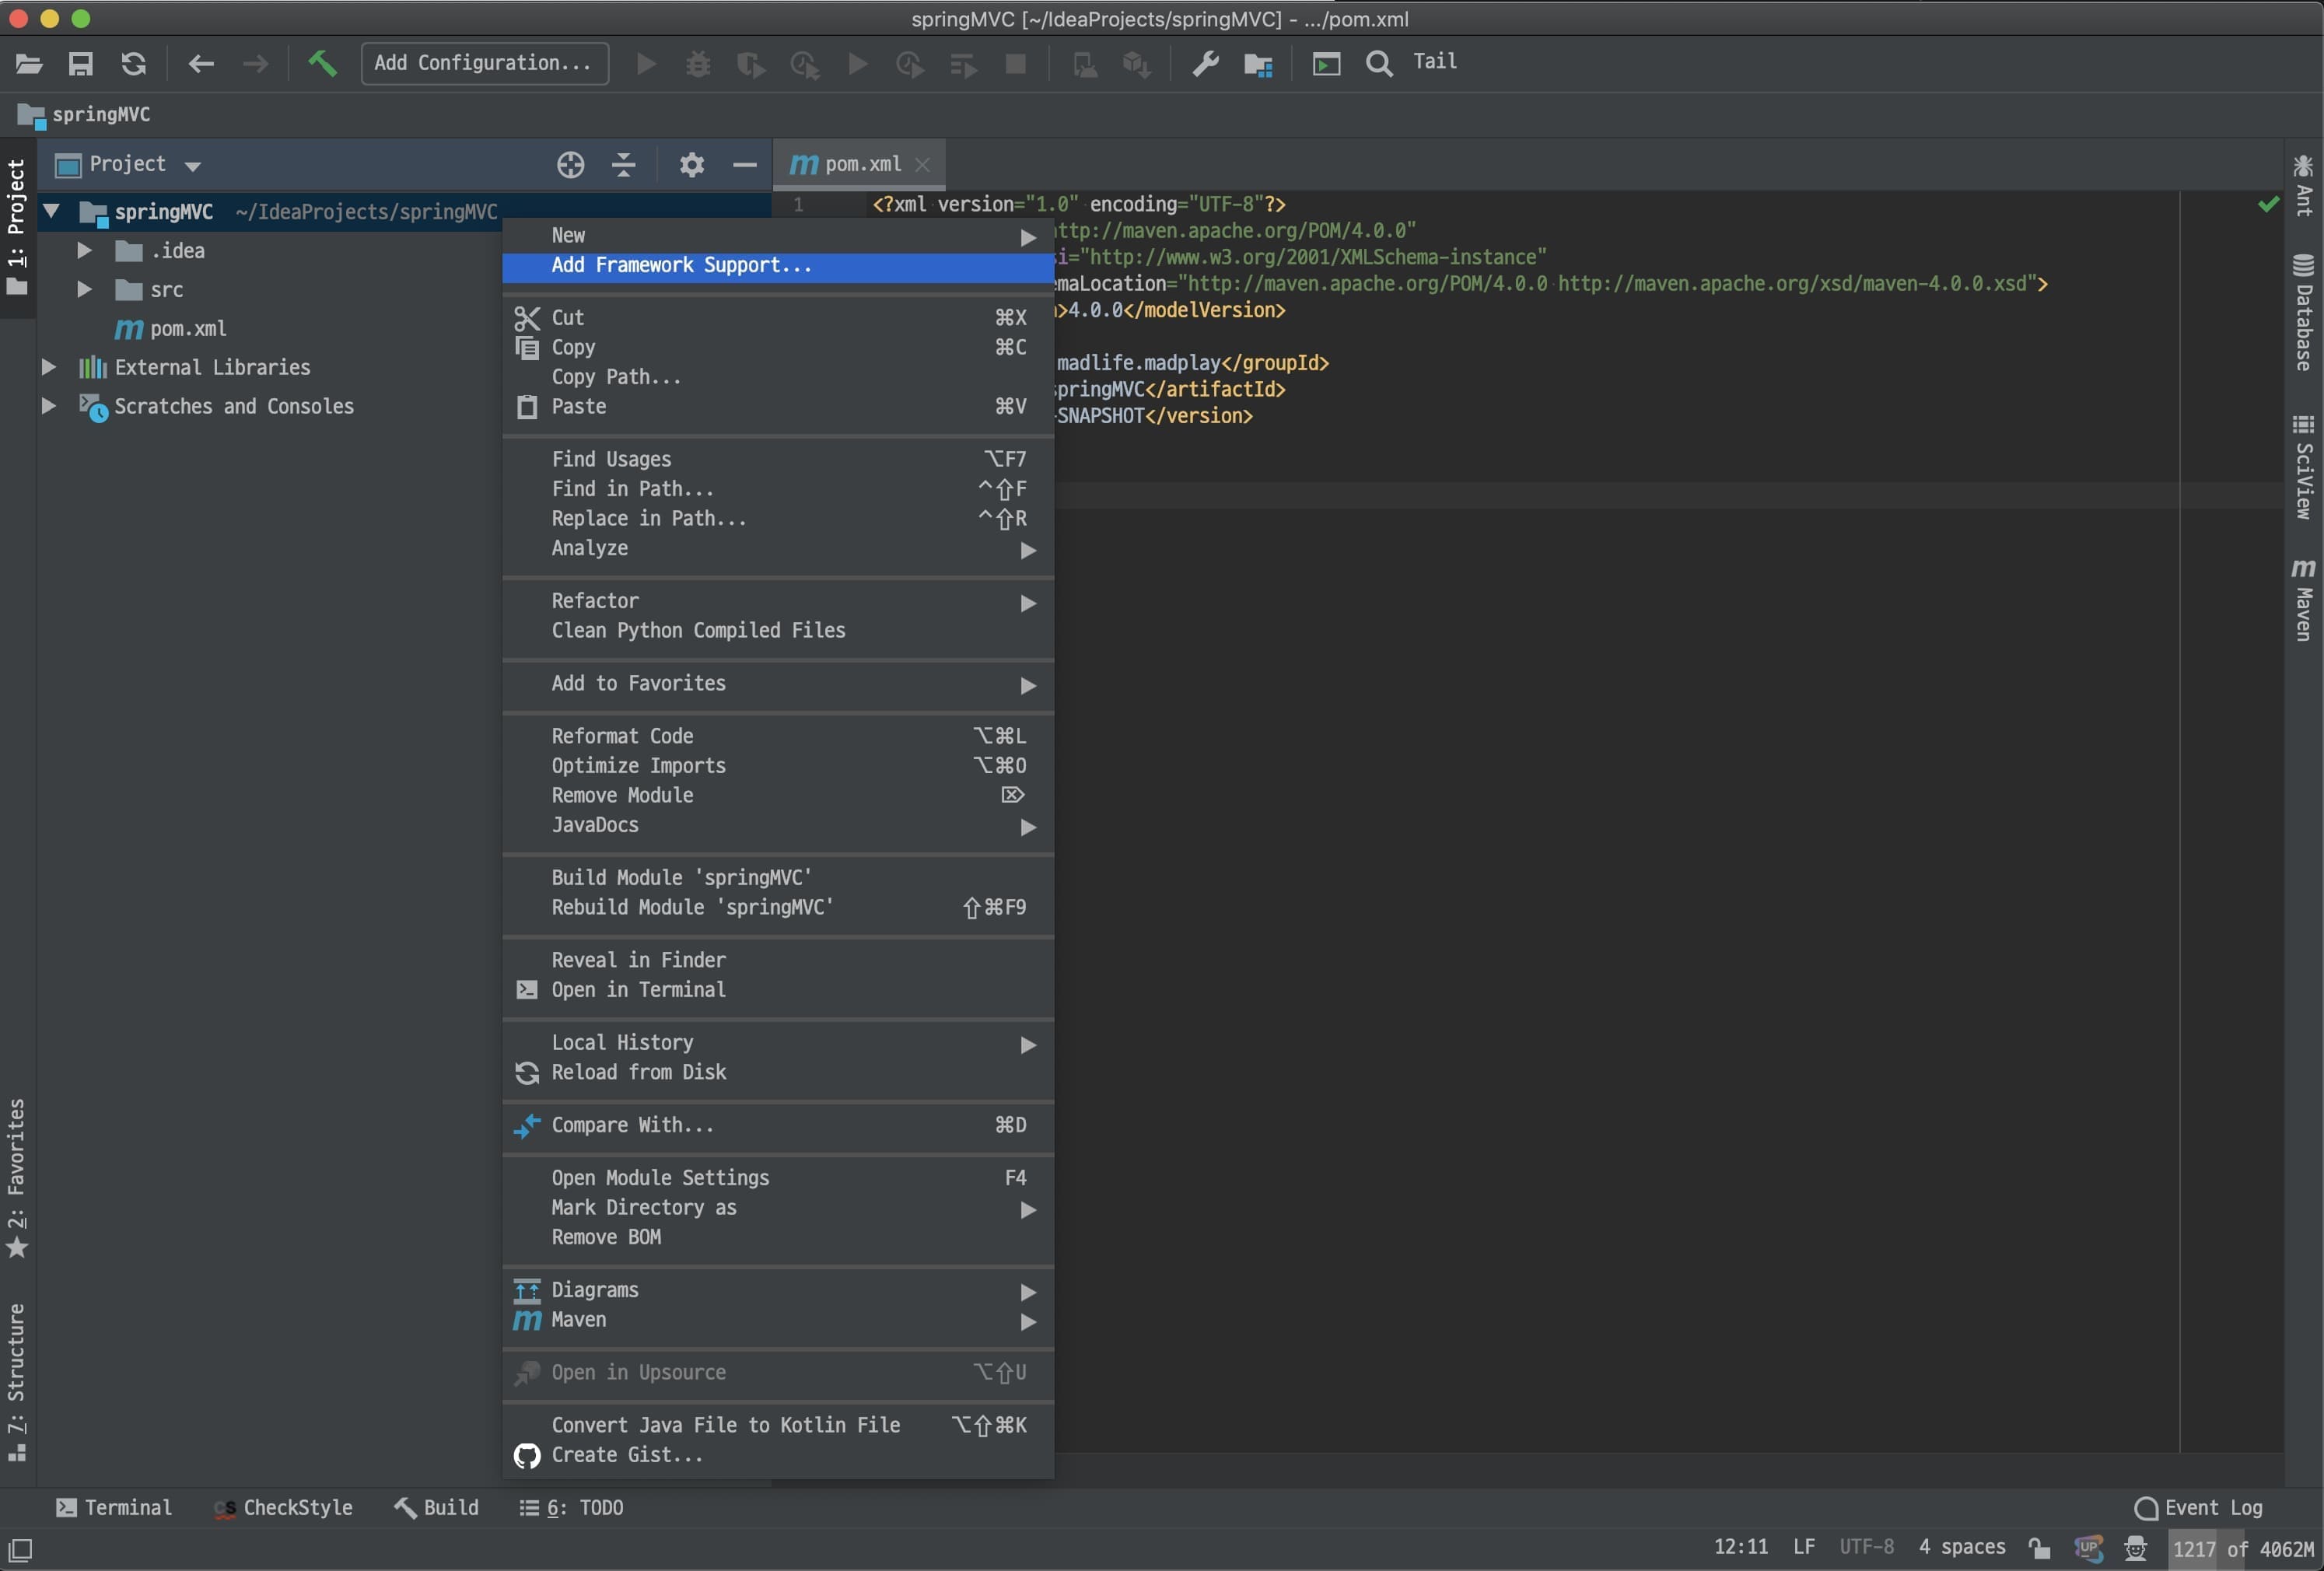
Add Framework Support
- Right-click the project and choose
Add Framework Support....
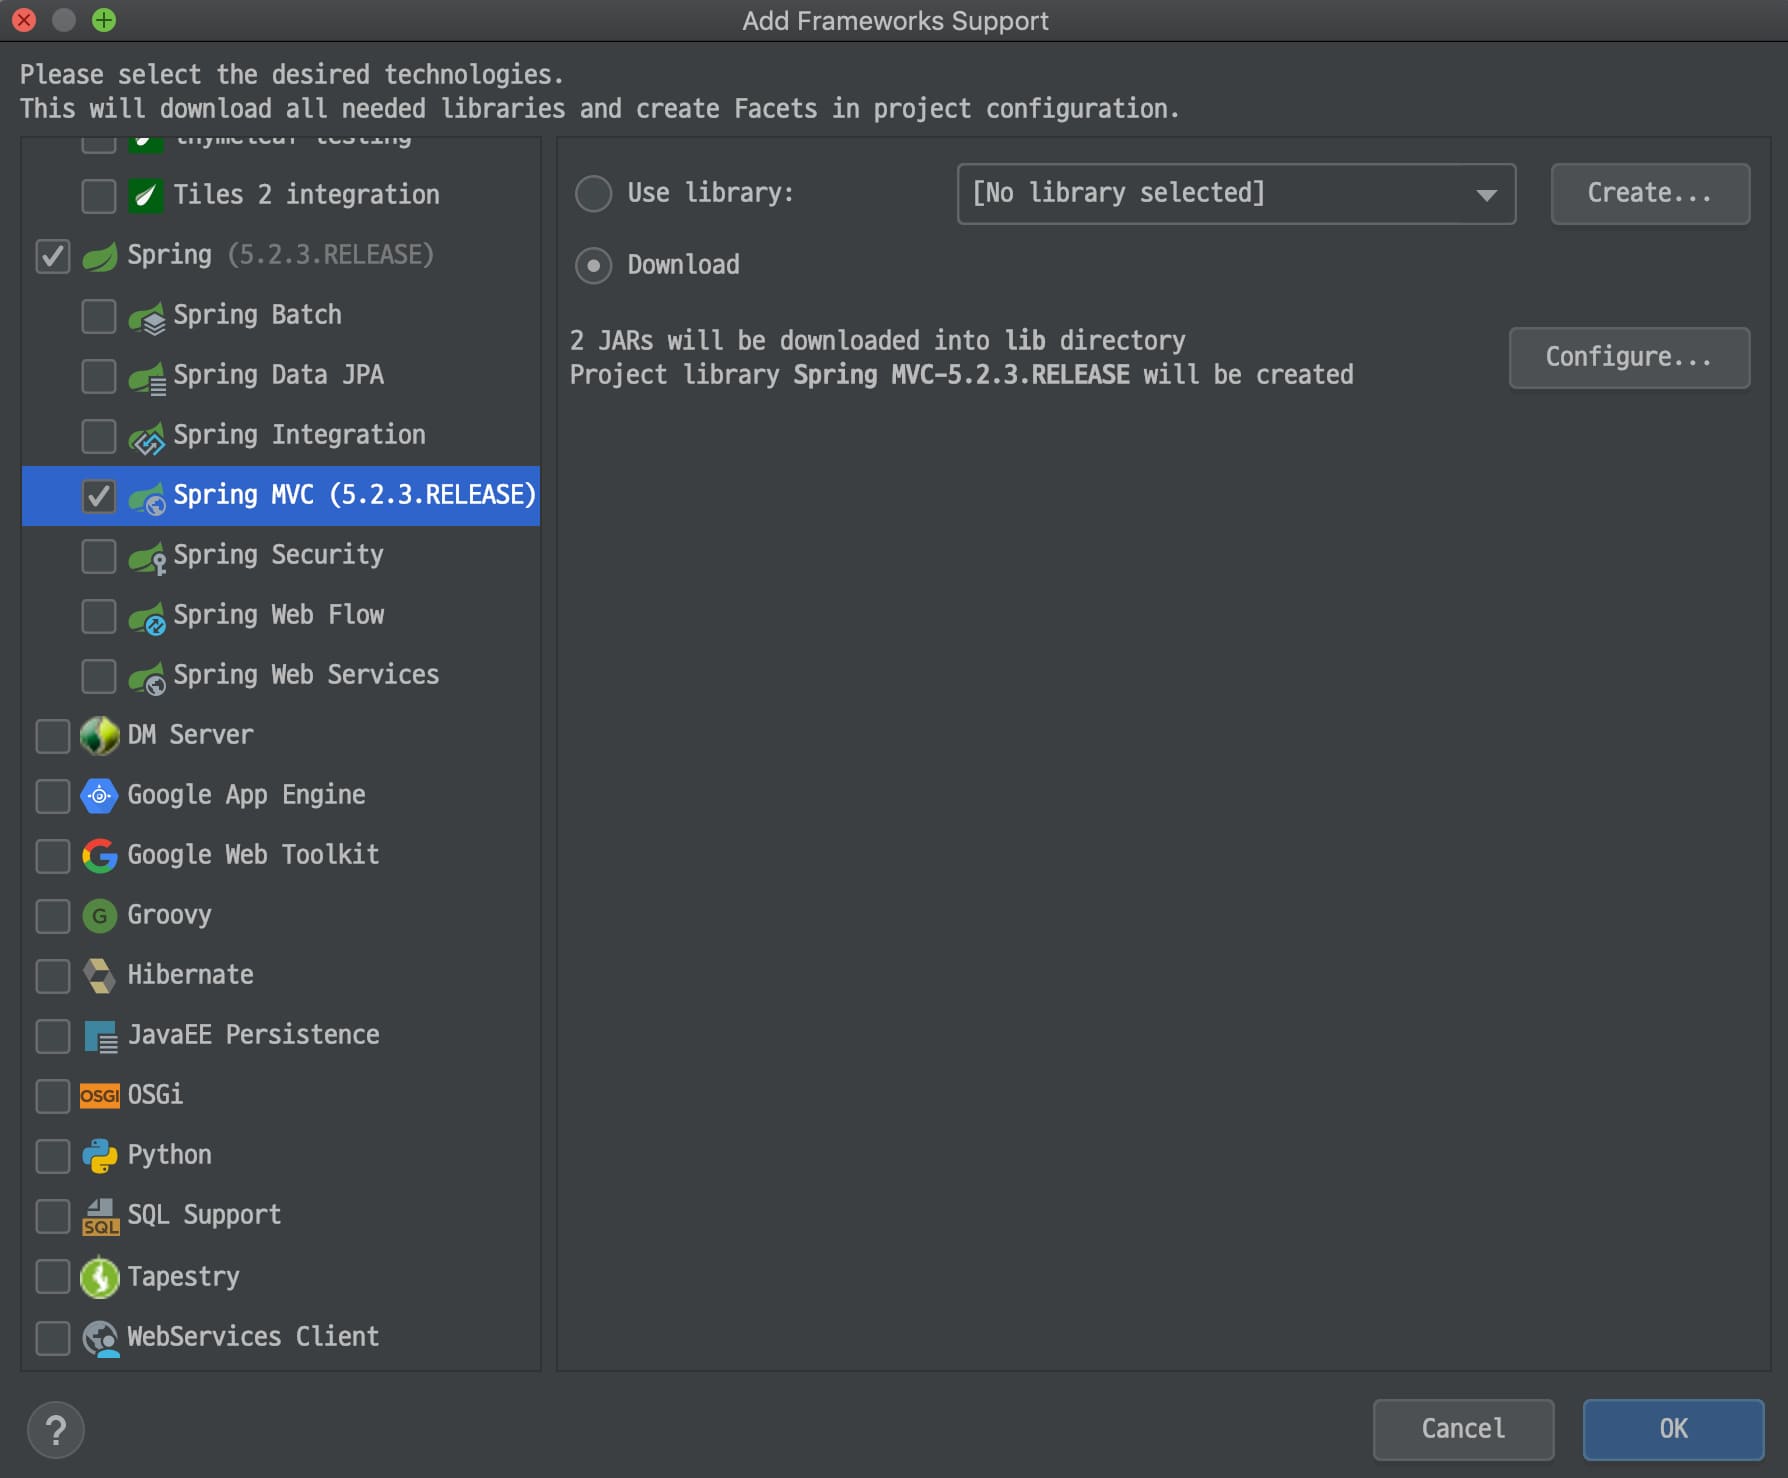
- Select
Spring MVCon the left.- If you choose to download, IntelliJ adds related config files automatically.
Project Configuration
After the project is created, update configuration files.
Update pom.xml
- Add the dependencies below to
pom.xml.- Use
^Nor right-click the editor to open the context menu. - Choose
Generate...and thenDependencyto search for artifacts.
- Use
- Add
spring-webmvc. Real projects typically require more dependencies.
<?xml version="1.0" encoding="UTF-8"?>
<project xmlns="http://maven.apache.org/POM/4.0.0"
         xmlns:xsi="http://www.w3.org/2001/XMLSchema-instance"
         xsi:schemaLocation="http://maven.apache.org/POM/4.0.0 http://maven.apache.org/xsd/maven-4.0.0.xsd">
    <modelVersion>4.0.0</modelVersion>

    <groupId>com.madlife.madplay</groupId>
    <artifactId>springMVC</artifactId>
    <version>1.0-SNAPSHOT</version>

    <!-- centralized version properties -->
    <properties>
        <spring.framework.version>5.2.4.RELEASE</spring.framework.version>
        <java.version>11</java.version>
    </properties>

    <dependencies>
        <dependency>
            <groupId>org.springframework</groupId>
            <artifactId>spring-webmvc</artifactId>
            <version>${spring.framework.version}</version>
        </dependency>
    </dependencies>

    <build>
        <plugins>
            <plugin>
                <groupId>org.apache.maven.plugins</groupId>
                <artifactId>maven-compiler-plugin</artifactId>
                <version>3.8.1</version>
                <configuration>
                    <source>${java.version}</source>
                    <target>${java.version}</target>
                </configuration>
            </plugin>
        </plugins>
    </build>
</project>
Update web.xml
- Change the
url-patterninweb.xml.- By default it is
*.form; change it to/.
- By default it is
- Add
absolute-ordering.- Without it, Tomcat shows:
More than one fragment with the name [spring_web] was found.
- Without it, Tomcat shows:
<?xml version="1.0" encoding="UTF-8"?>
<web-app xmlns="http://xmlns.jcp.org/xml/ns/javaee"
         xmlns:xsi="http://www.w3.org/2001/XMLSchema-instance"
         xsi:schemaLocation="http://xmlns.jcp.org/xml/ns/javaee http://xmlns.jcp.org/xml/ns/javaee/web-app_4_0.xsd"
         version="4.0">

    <!-- required to avoid startup errors -->
    <absolute-ordering/>

    <context-param>
        <param-name>contextConfigLocation</param-name>
        <param-value>/WEB-INF/applicationContext.xml</param-value>
    </context-param>

    <listener>
        <listener-class>org.springframework.web.context.ContextLoaderListener</listener-class>
    </listener>

    <servlet>
        <servlet-name>dispatcher</servlet-name>
        <servlet-class>org.springframework.web.servlet.DispatcherServlet</servlet-class>
        <init-param>
            <param-name>contextConfigLocation</param-name>
            <param-value>/WEB-INF/dispatcher-servlet.xml</param-value>
        </init-param>
        <load-on-startup>1</load-on-startup>
    </servlet>

    <servlet-mapping>
        <servlet-name>dispatcher</servlet-name>
        <url-pattern>/</url-pattern>
    </servlet-mapping>
</web-app>
Update the Servlet Config
- Update
dispatcher-servlet.xml.- You can rename the file if you want, but update
web.xmlaccordingly.
- You can rename the file if you want, but update
- Add
<mvc:annotation-driven/>to register required MVC beans. - Add
<context:component-scan>and setbase-package. - Configure the view resolver. The values below are a good starting point.
<?xml version="1.0" encoding="UTF-8"?>
<beans xmlns="http://www.springframework.org/schema/beans"
       xmlns:xsi="http://www.w3.org/2001/XMLSchema-instance" xmlns:mvc="http://www.springframework.org/schema/mvc"
       xmlns:context="http://www.springframework.org/schema/context"
       xsi:schemaLocation="http://www.springframework.org/schema/beans http://www.springframework.org/schema/beans/spring-beans.xsd http://www.springframework.org/schema/mvc https://www.springframework.org/schema/mvc/spring-mvc.xsd http://www.springframework.org/schema/context https://www.springframework.org/schema/context/spring-context.xsd">

    <!-- enable annotation-based MVC -->
    <mvc:annotation-driven/>

    <!-- base package -->
    <context:component-scan base-package="com.madlife.madplay"/>

    <!-- view resolver -->
    <bean class="org.springframework.web.servlet.view.InternalResourceViewResolver">
        <property name="prefix" value="/WEB-INF/views/"/>
        <property name="suffix" value=".jsp"/>
    </bean>
</beans>
Add Server Code
Now add the server-side code.
Add a Controller
- Under
src/main/java, create thecom.madlife.madplaypackage.- This matches the
base-packageindispatcher-servlet.xml.
- This matches the
- Add
HomeController.java.
package com.madlife.madplay;

import org.springframework.stereotype.Controller;
import org.springframework.web.bind.annotation.RequestMapping;
import org.springframework.web.servlet.ModelAndView;

/**
 * @author madplay
 */
@Controller
public class HomeController {

	@RequestMapping(value = "/")
	public ModelAndView home() {
		ModelAndView mav = new ModelAndView();
		mav.addObject("message", "Hello, World!");
		mav.setViewName("hello");
		return mav;
	}
}
Add the View
- Create a
viewsdirectory underweb/WEB-INF.- If you change the path, update
dispatcher-servlet.xml.
- If you change the path, update
- Add
hello.jsptoviews.
<%@ page contentType="text/html;charset=UTF-8" language="java" %>
<html>
<head>
    <title>Hello World.</title>
</head>
<body>
    <h2>${message}</h2>
</body>
</html>
Run the Server
Configuration and code are done. Now add Tomcat and run it.
Add Tomcat
- Click
Run > Edit Configurations...and add a Tomcat server.
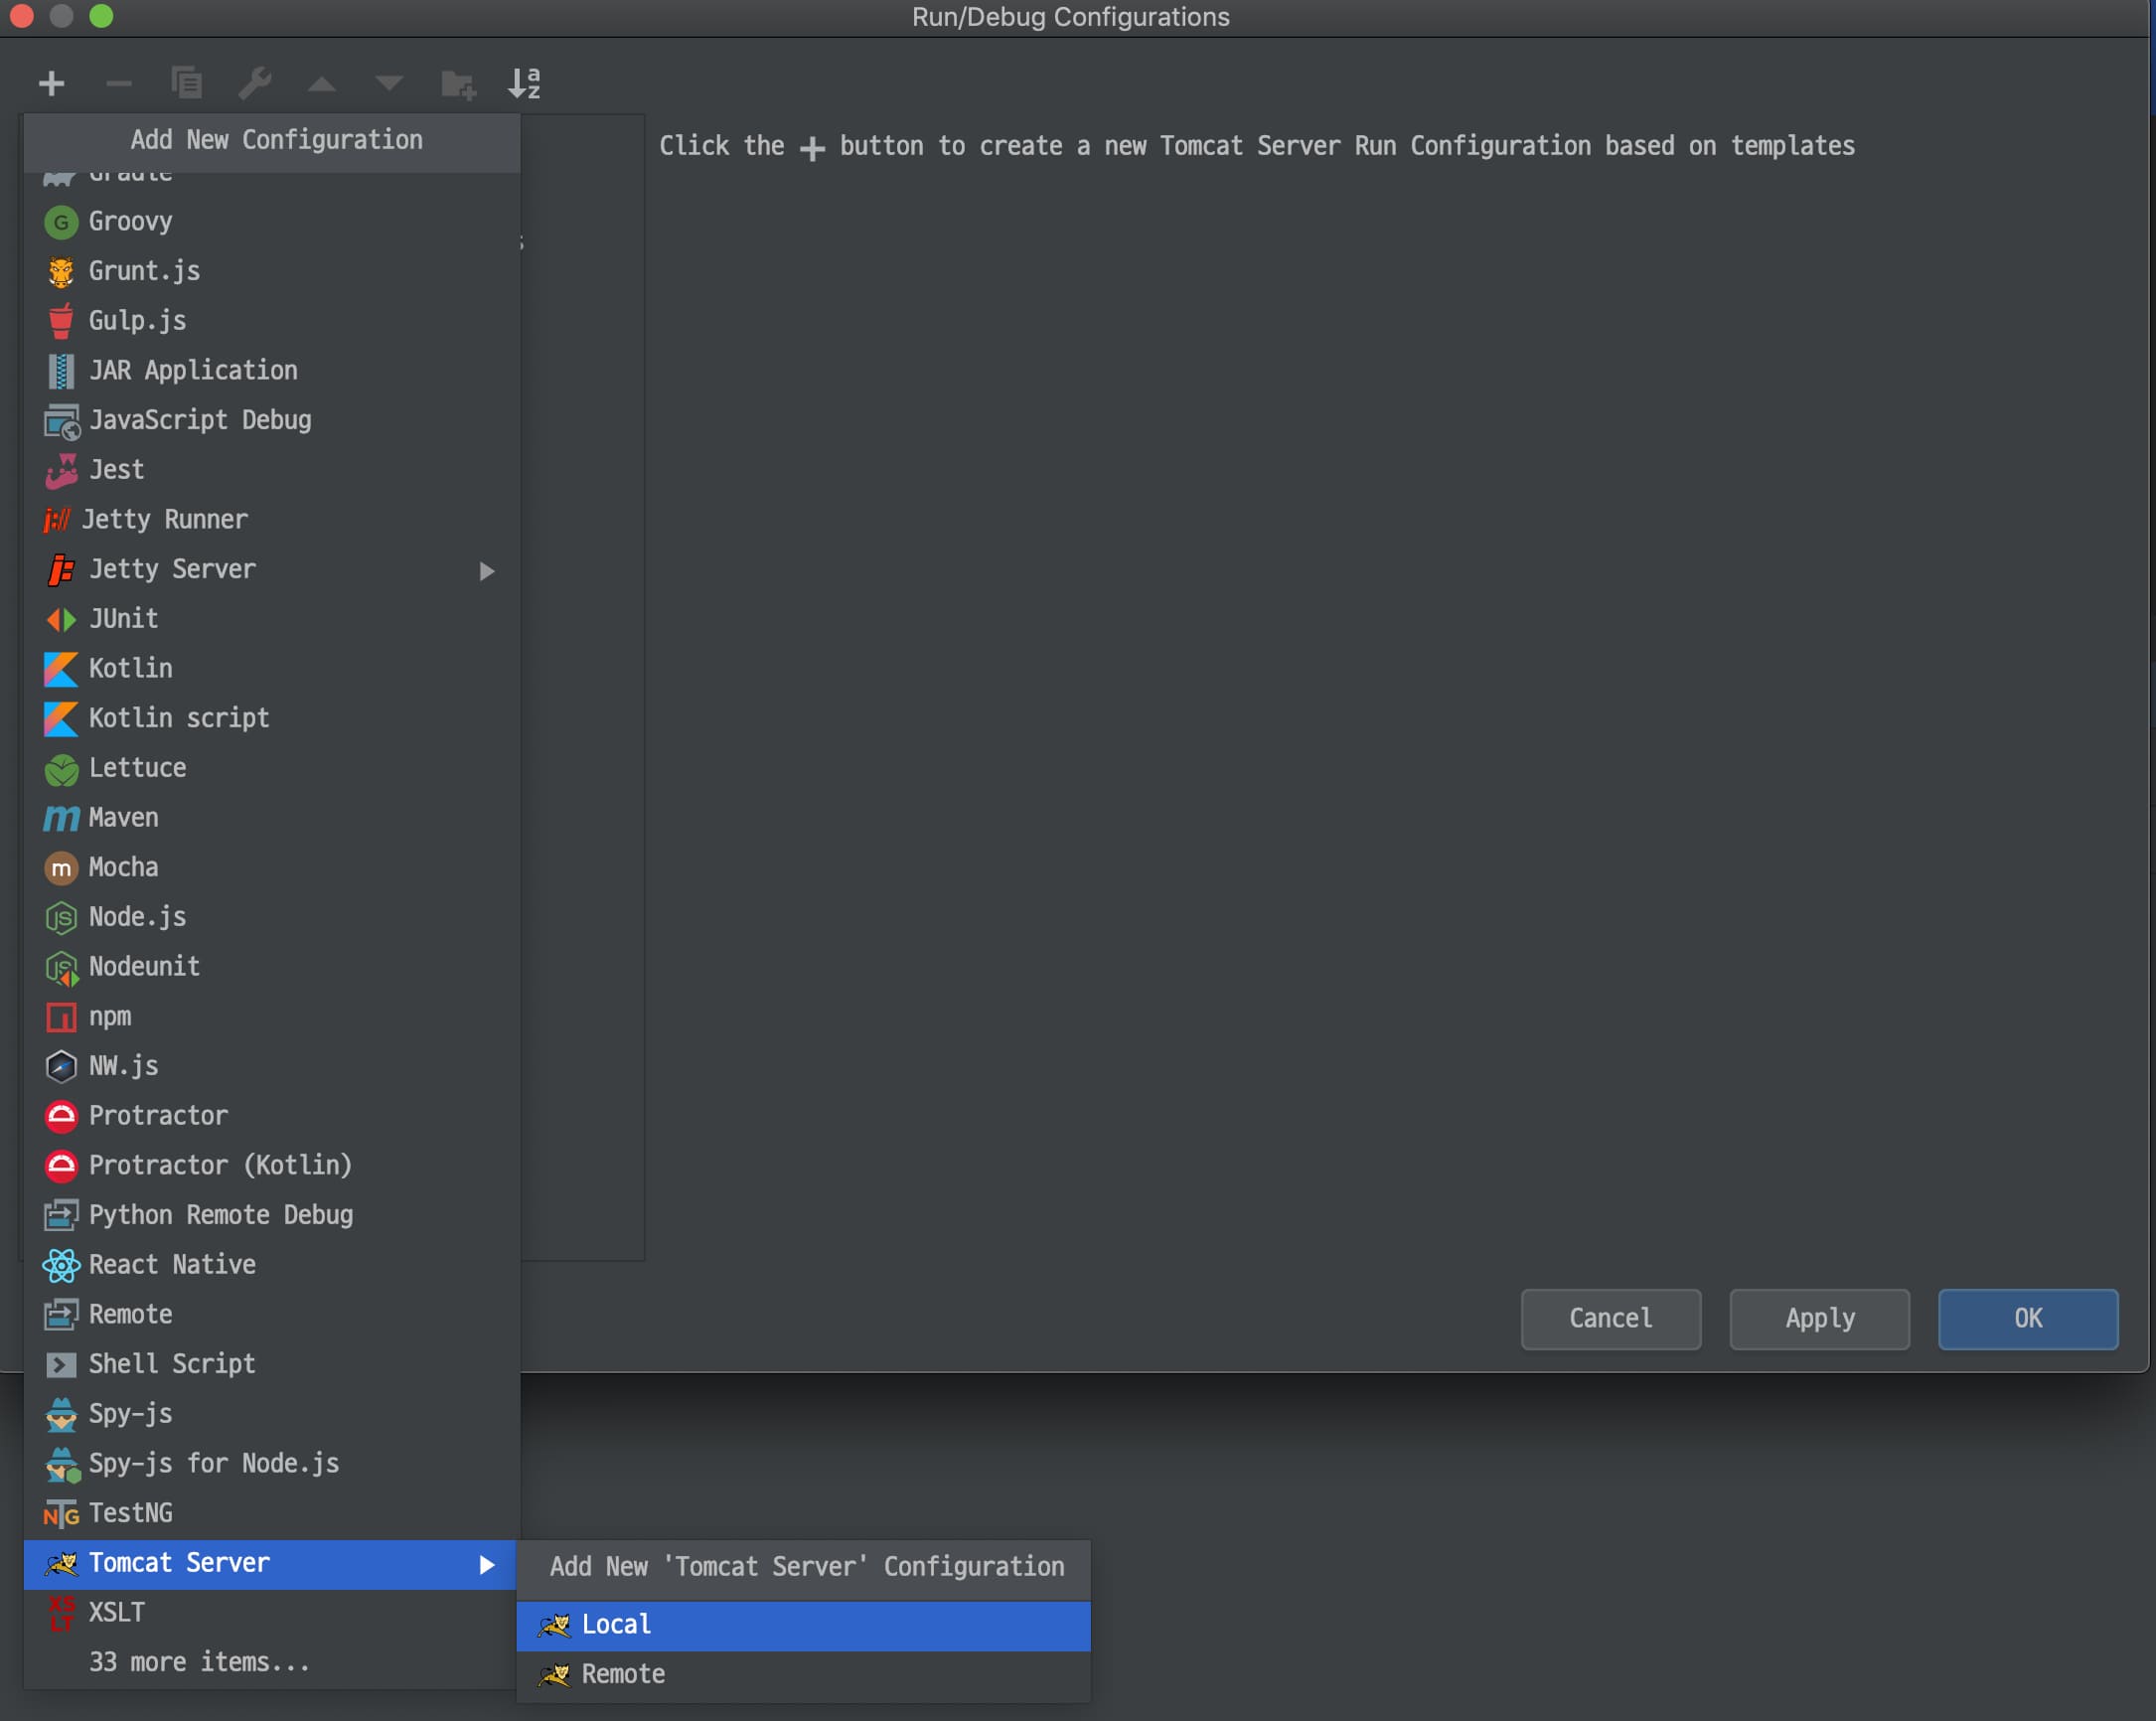
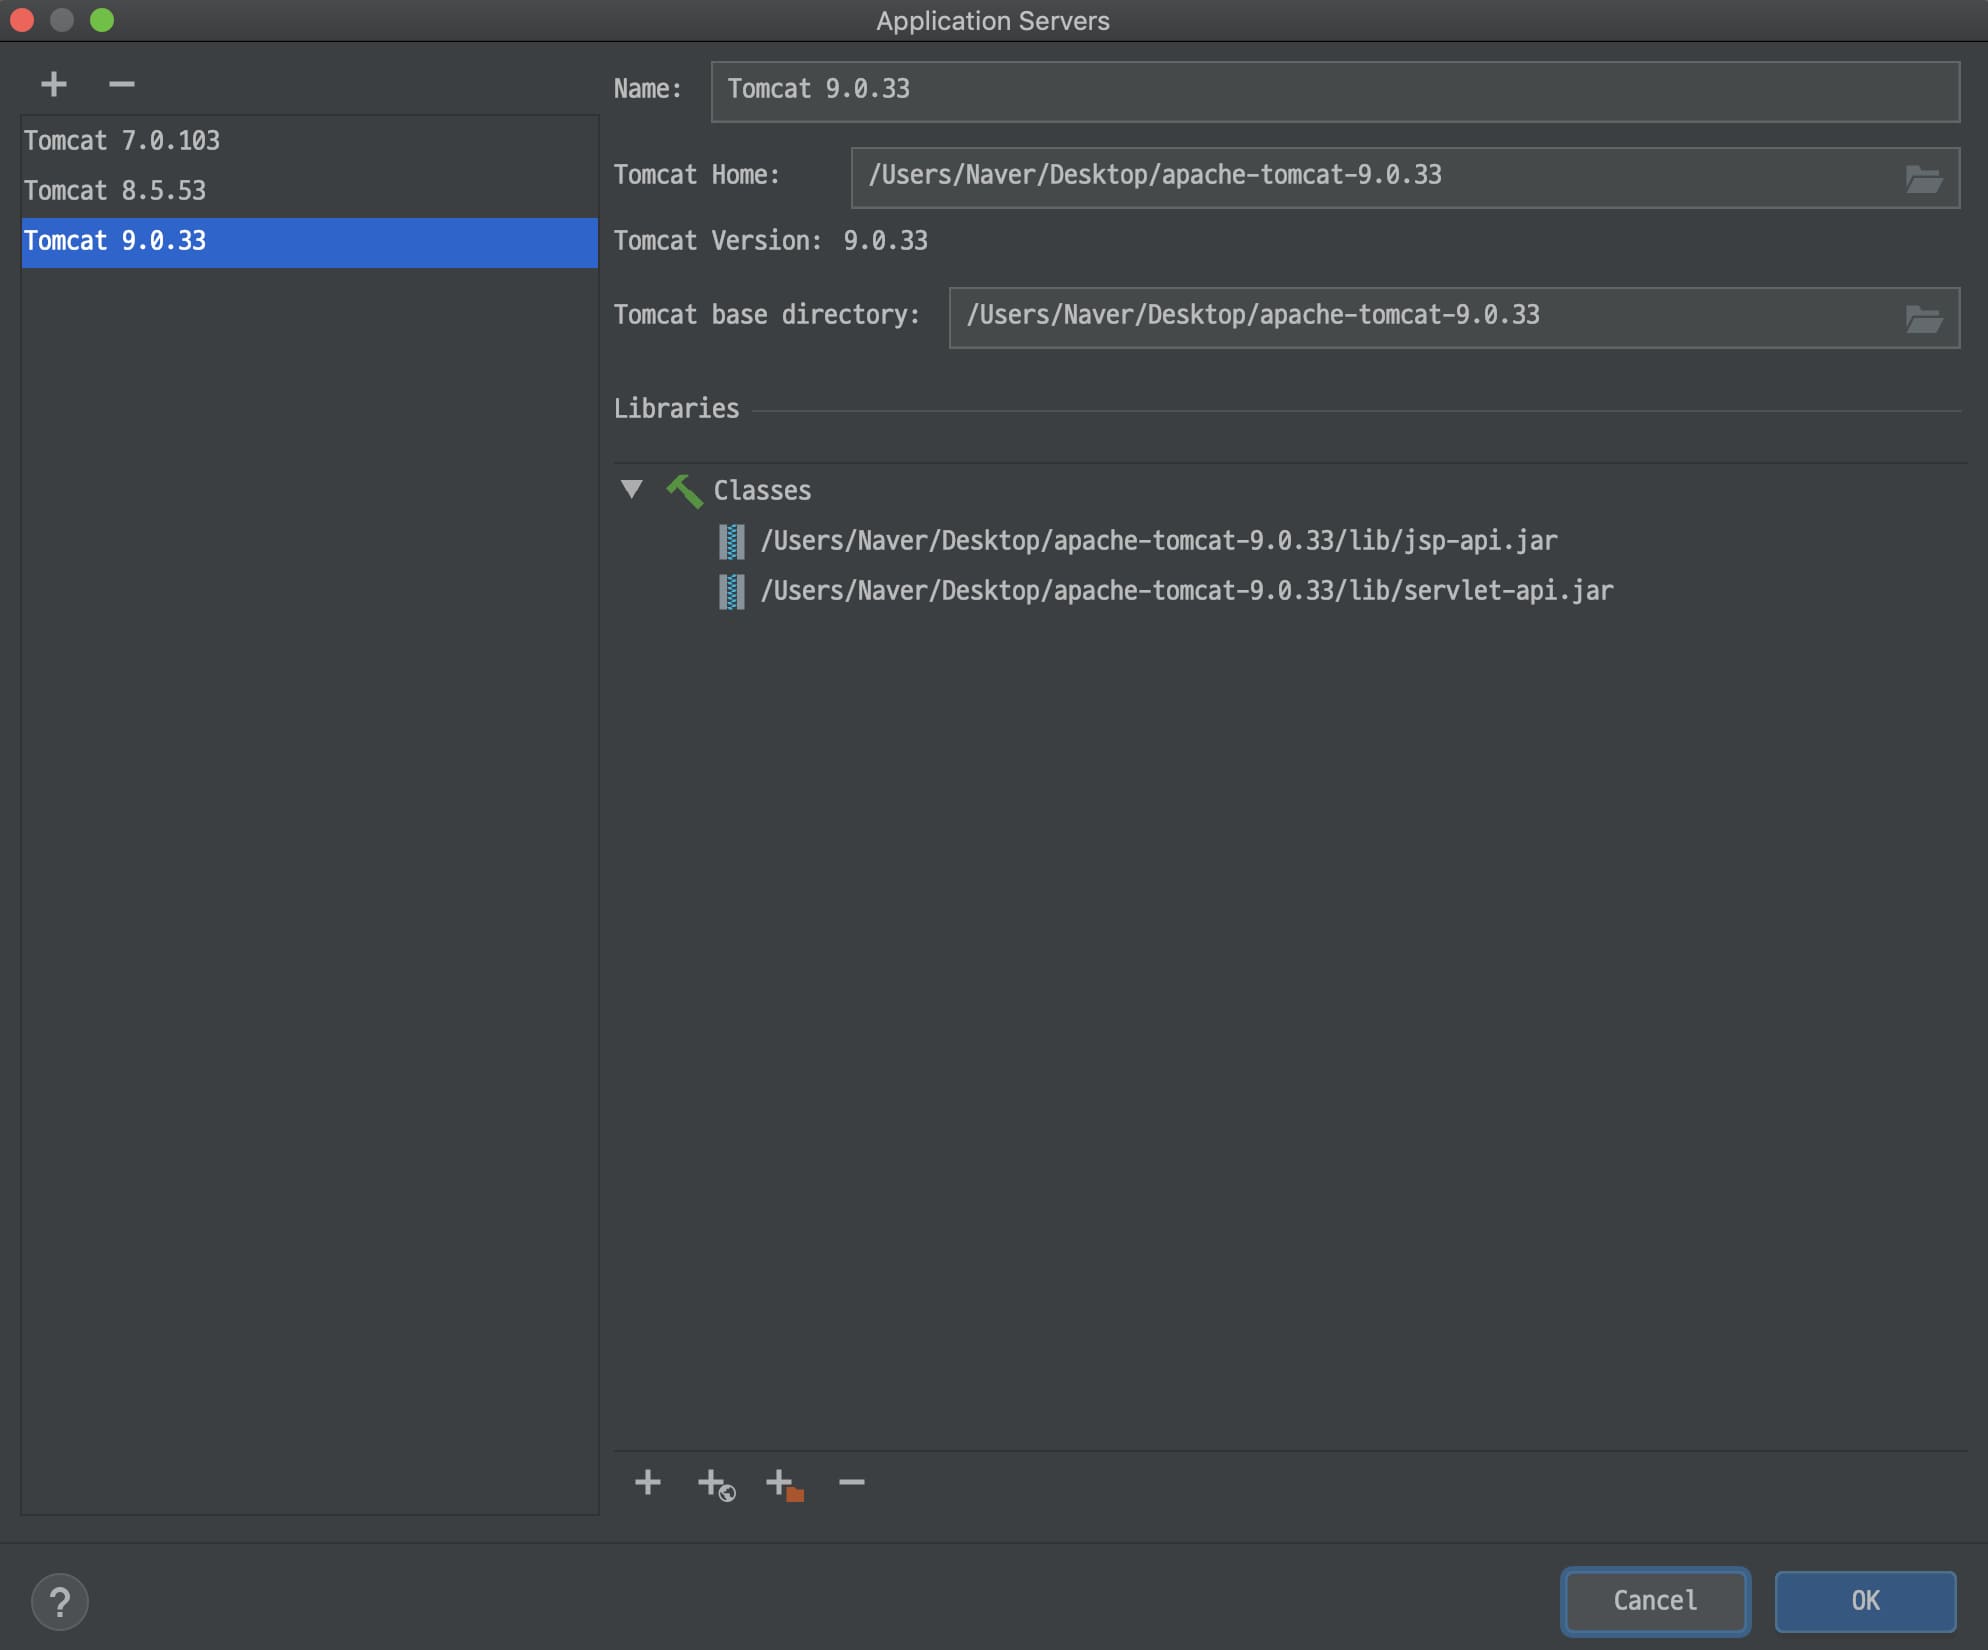
- Click
Configure...and set Tomcat 9 inApplication Servers.- Download Tomcat from the official site.
- Link: https://tomcat.apache.org/download-90.cgi
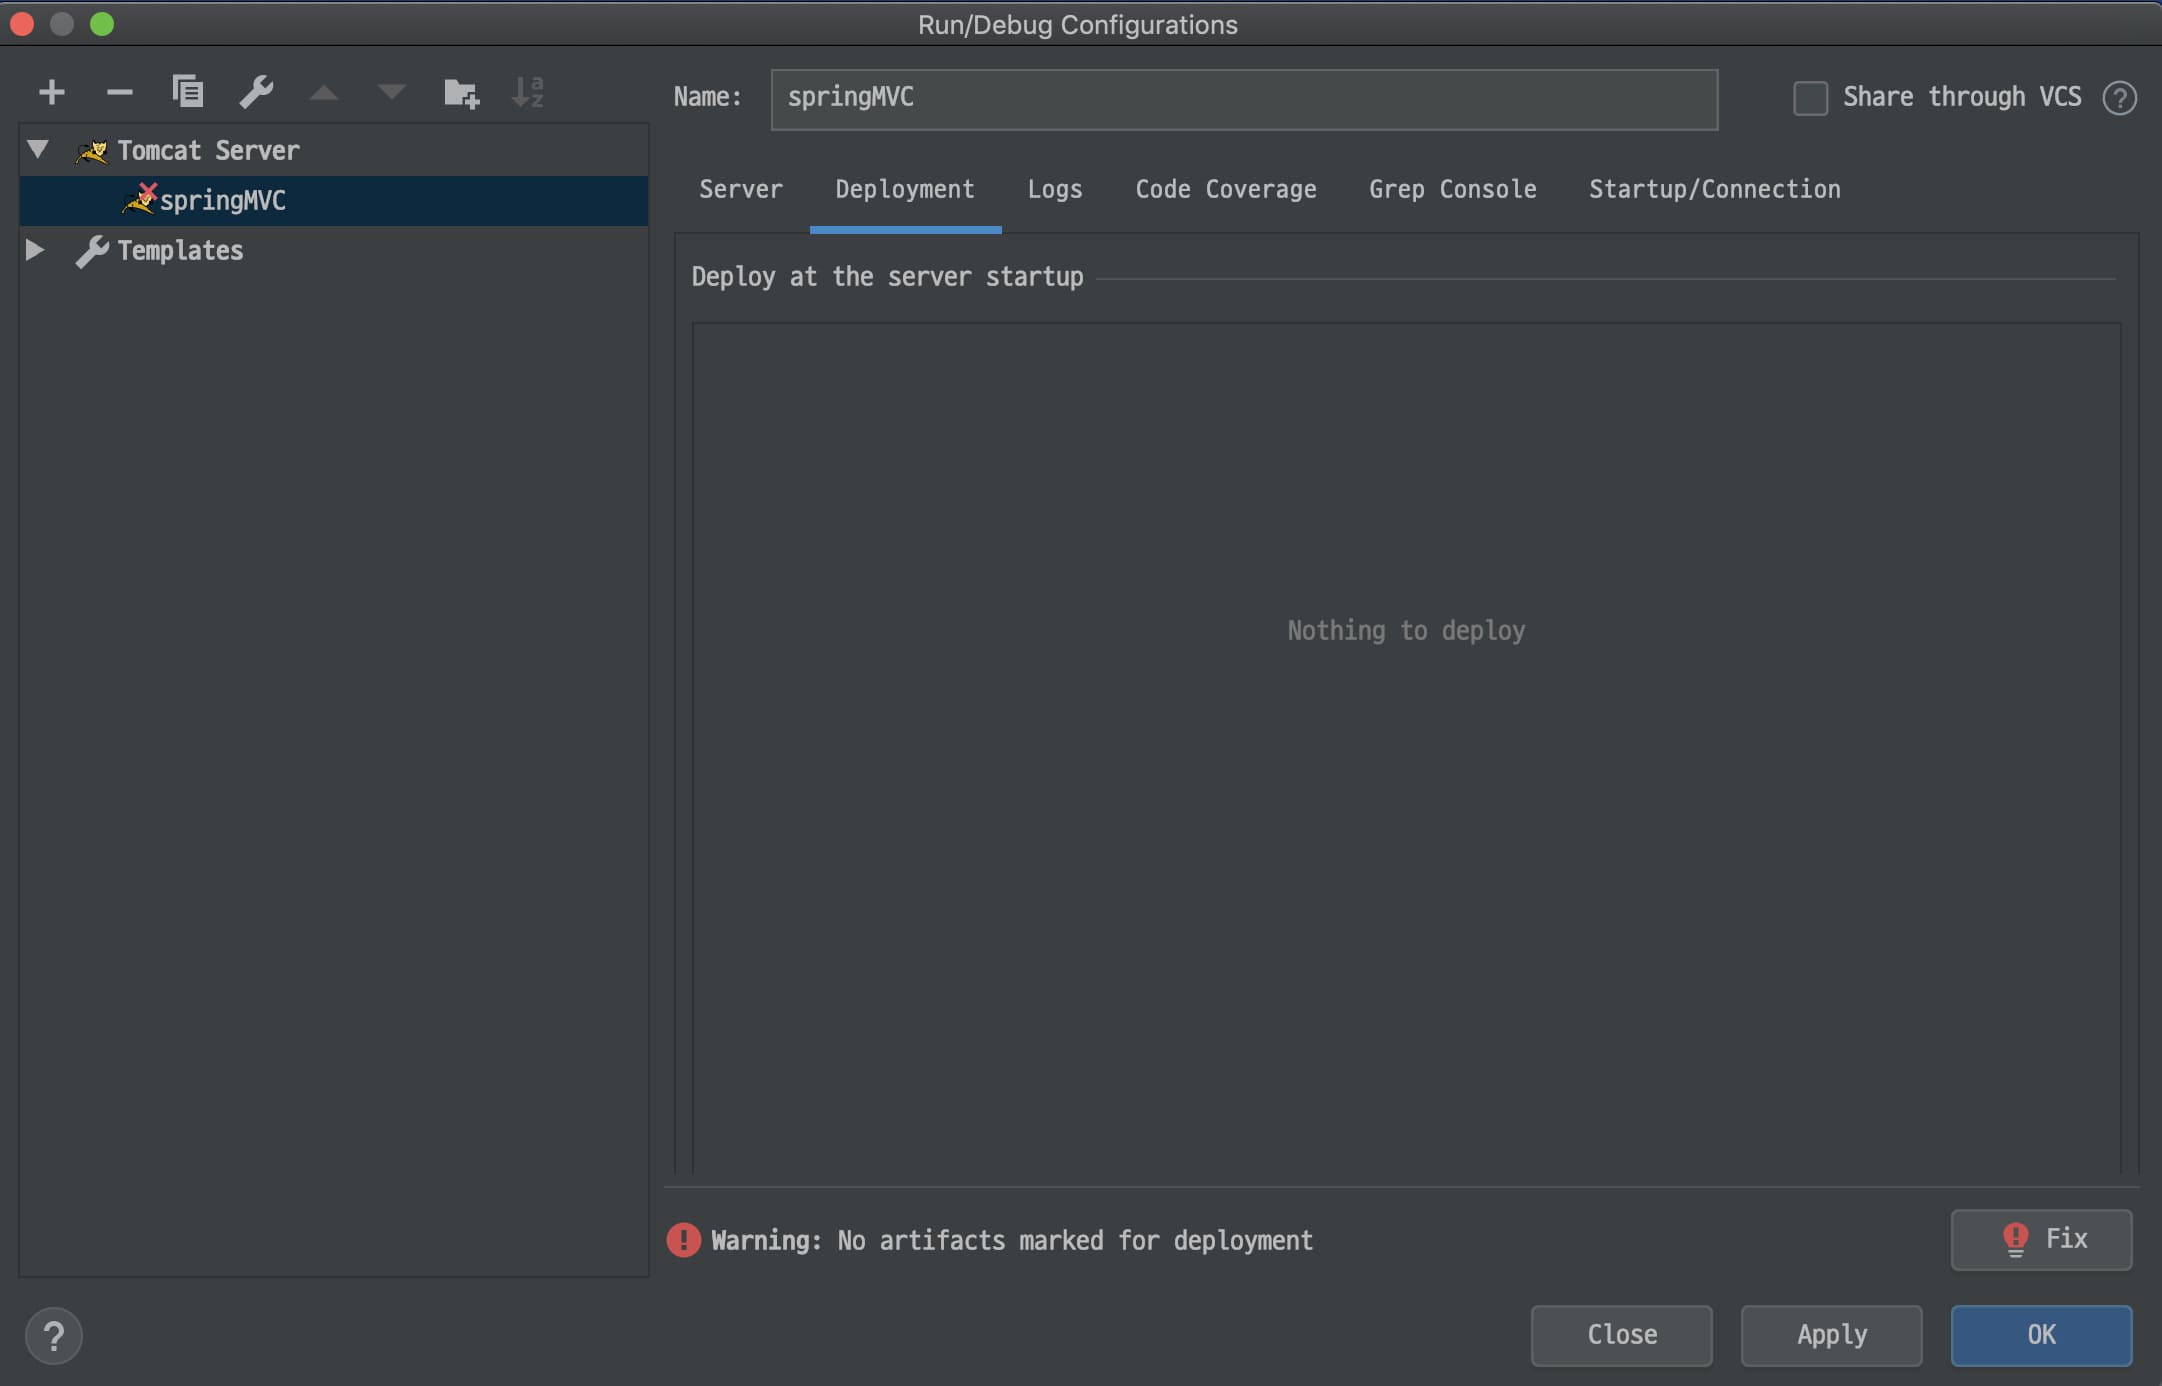
- If
artifactis missing, you will see an error at the bottom.- Click
Fixto add the artifact.
- Click
- If it does not appear automatically, go to
Build > Build Artifacts.
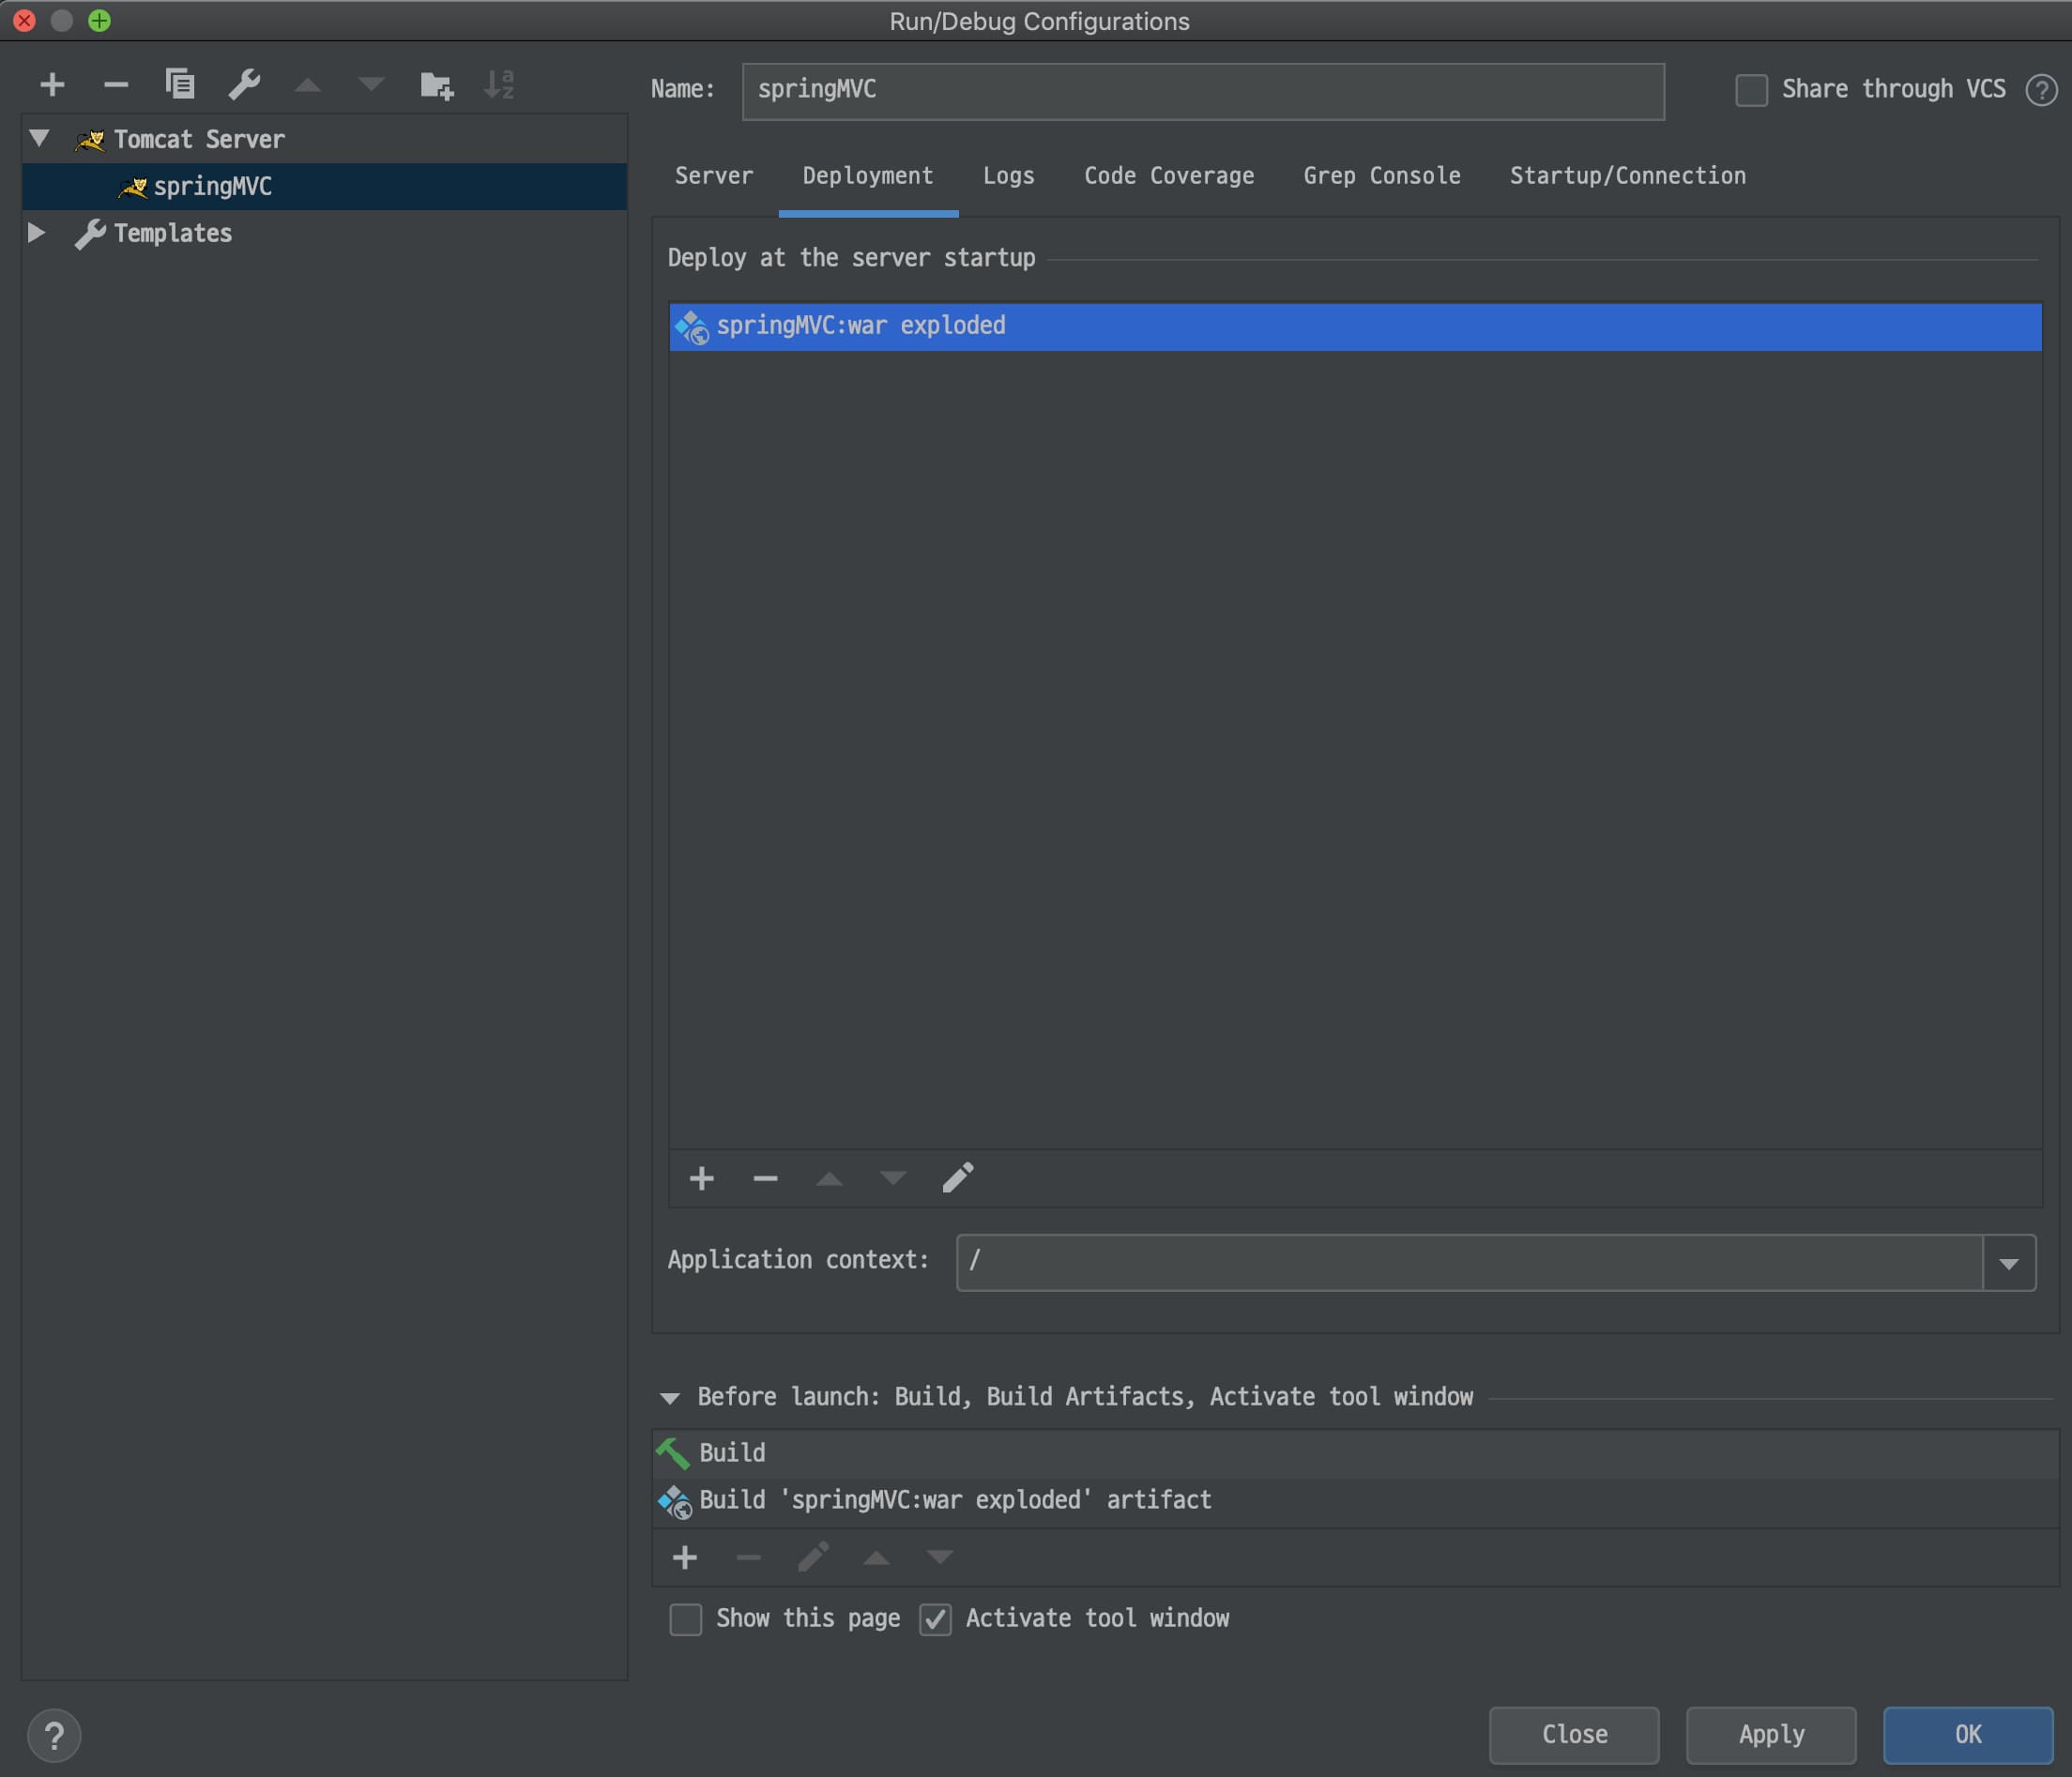
- Set
Application contextto/.- This sets the default context path when the server starts.
- For example,
/mainwould make the base pathhttp://localhost:8080/main.
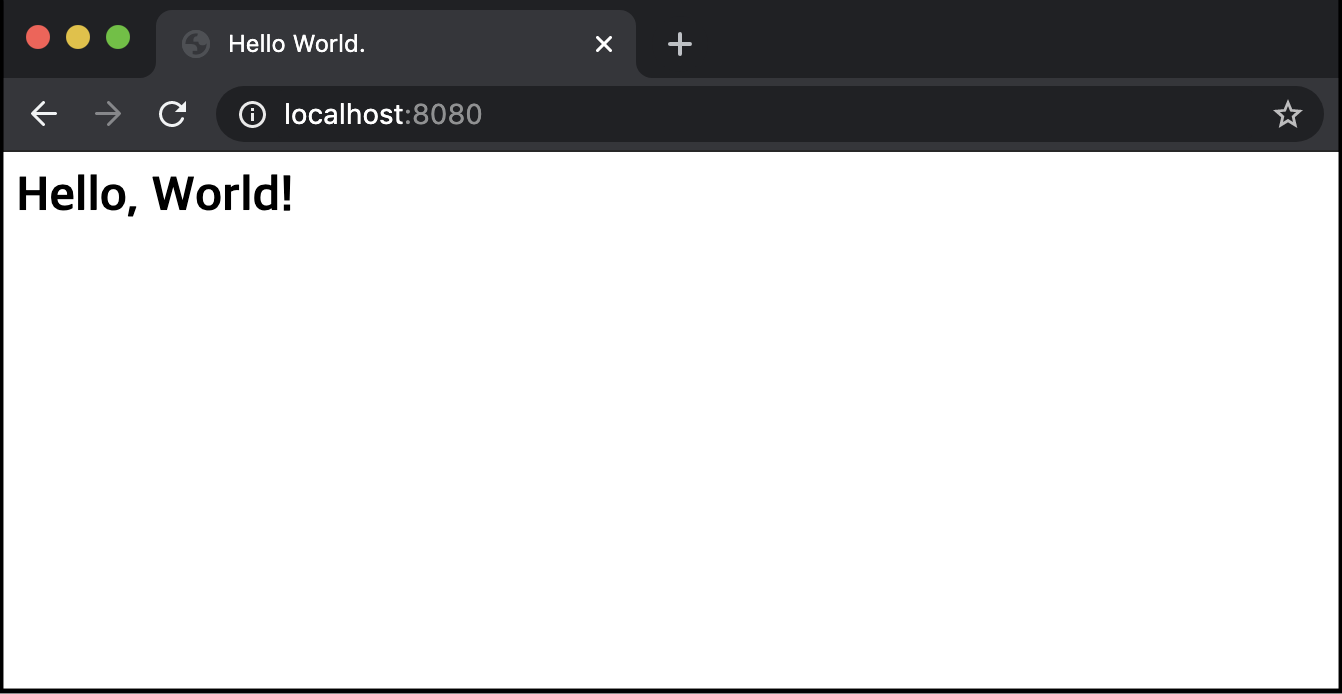
Verify the Server
- Start Tomcat and open
http://localhost:8080.- If the page loads as shown below, the setup is complete.
The Spring MVC project and baseline configuration are now complete.